

Introduction
This page is intended to help principal administrator to manage their structures and associated services.
1. Manage the information of your structure
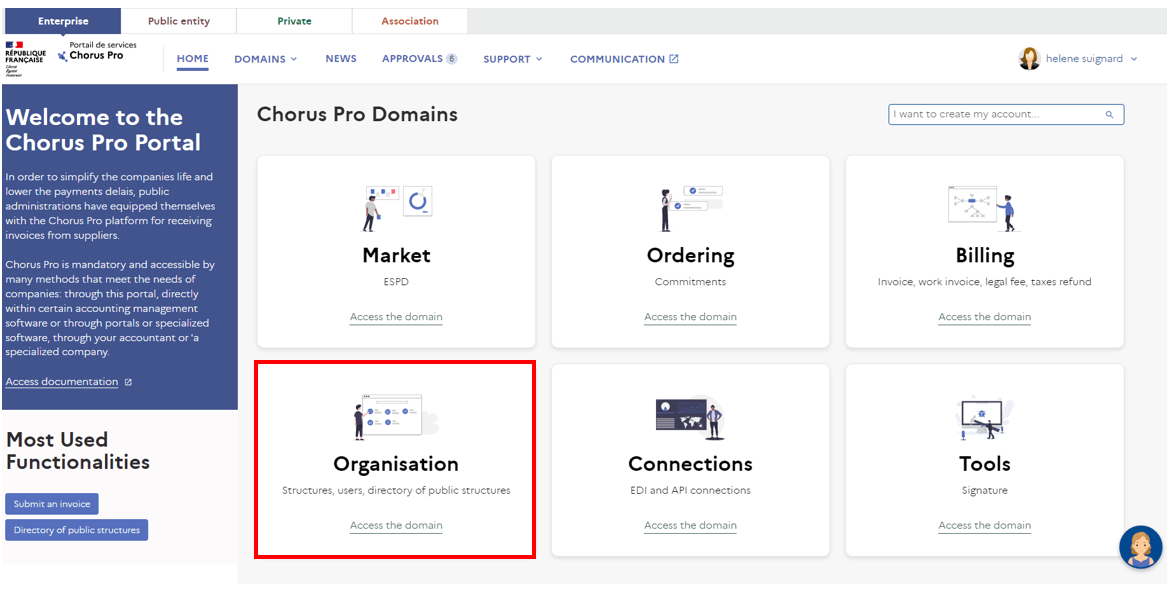
To manage your structure, you must access the « Organisation » area. From the home page of the Chorus Pro services portal, click on the « Organisation » area.
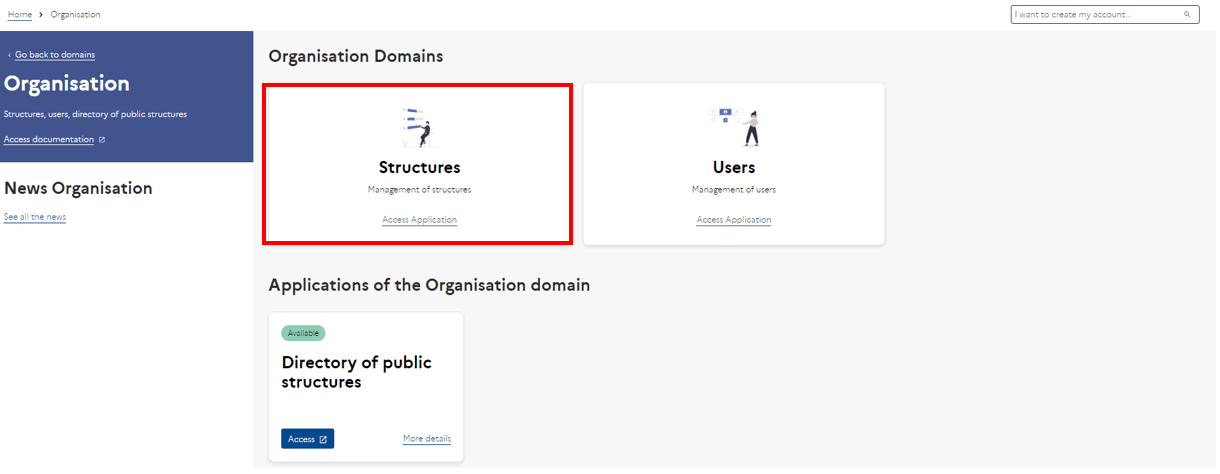
In the « Organisation » area, click on the « Structures » area.
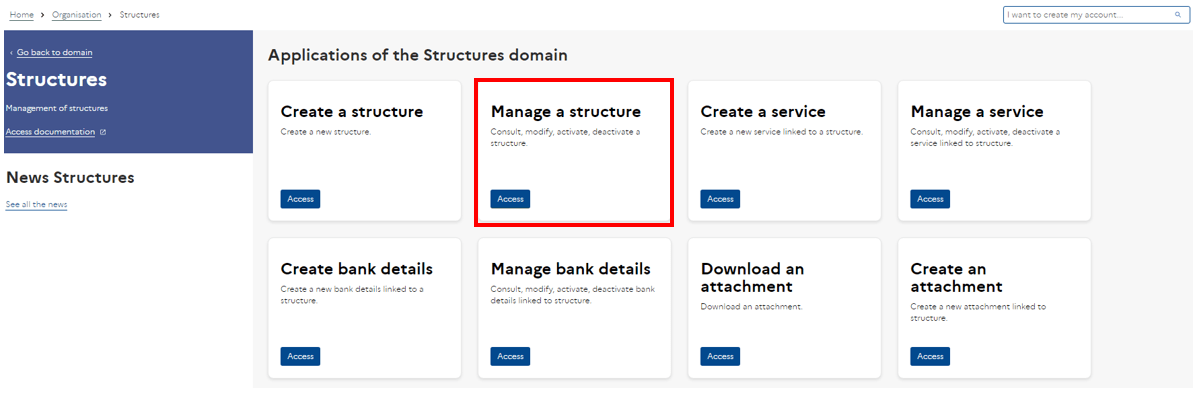
Then you can click on the « Manage a structure » application. You will have access to all the functions that allow you to manage your structure on the Chorus Pro service portal.
In the « Manage a structure » application, select a request type, then click « Submit » to validate your request.

You can make 5 types of requests:
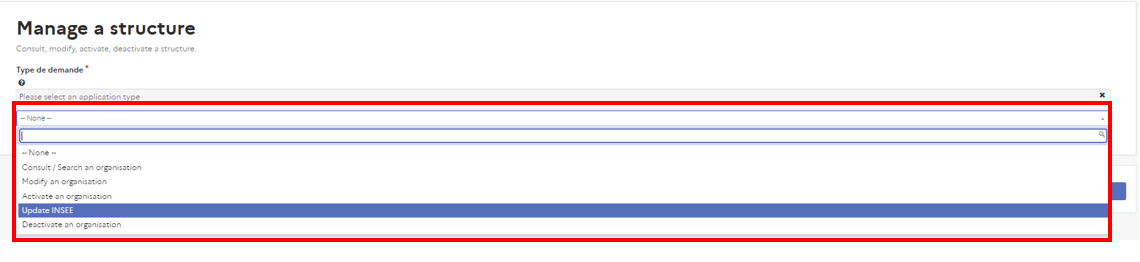
- Consult/search an organisation
- Modify an organisation
- Activate an organisation
- Update INSEE
- Deactivate an organisation
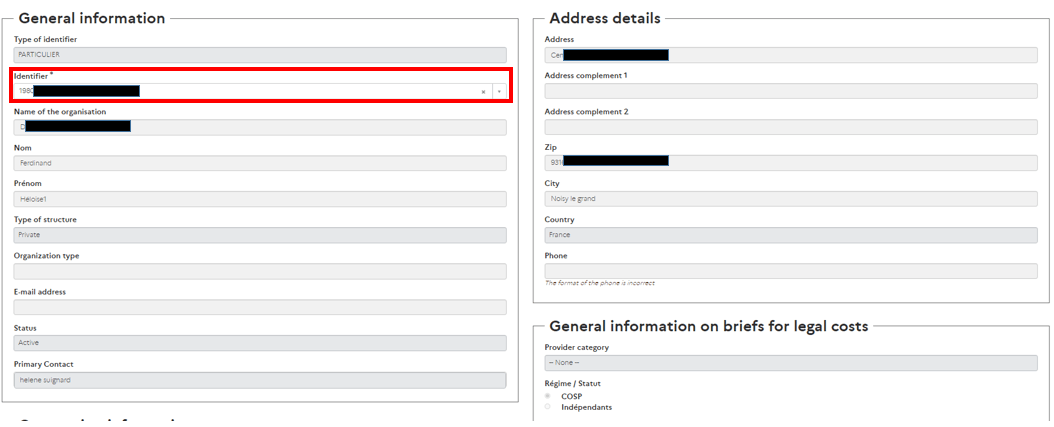
This functionality will allow you to consult the information of your structure without being able to modify it. To do so, select « Consult / search an organisation » in the type of request.
Then select one of the structures to which you are attached in the « Identifier » field. All the information about the facility is displayed.

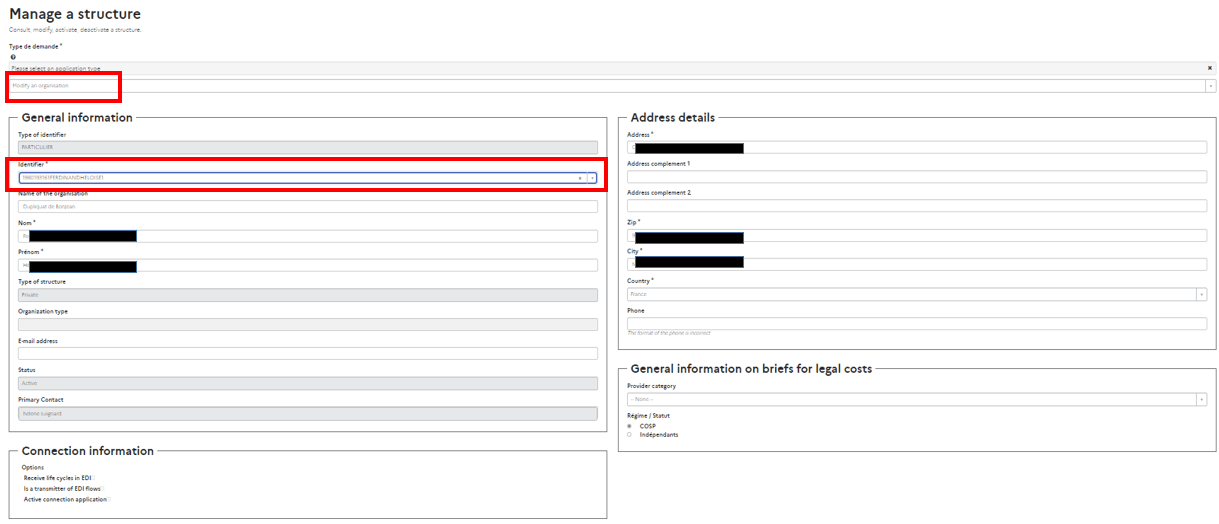
This functionality will allow you to modify the modifiable information (not grayed out) of your structure. To do so, select « Modify an organisation » in the type of request.
Then select one of the structures to which you are attached in the « Identifier » field.
Make changes to the modifiable information in the unshaded fields, then click on
« Submit » at the bottom of the page. A message will be displayed to confirm the changes.
The change will be effective after 30 minutes.
This feature allows you to reactivate a structure that you have previously deactivated or that has never been activated. To do this, select « Activate an organisation" in the request type.
Then select one of the structures in the « Identifier » field. The structures are all inactive.
Then click on « Submit » at the bottom of the page. A message will be displayed to confirm the changes. The modification will be effective after 30 minutes.

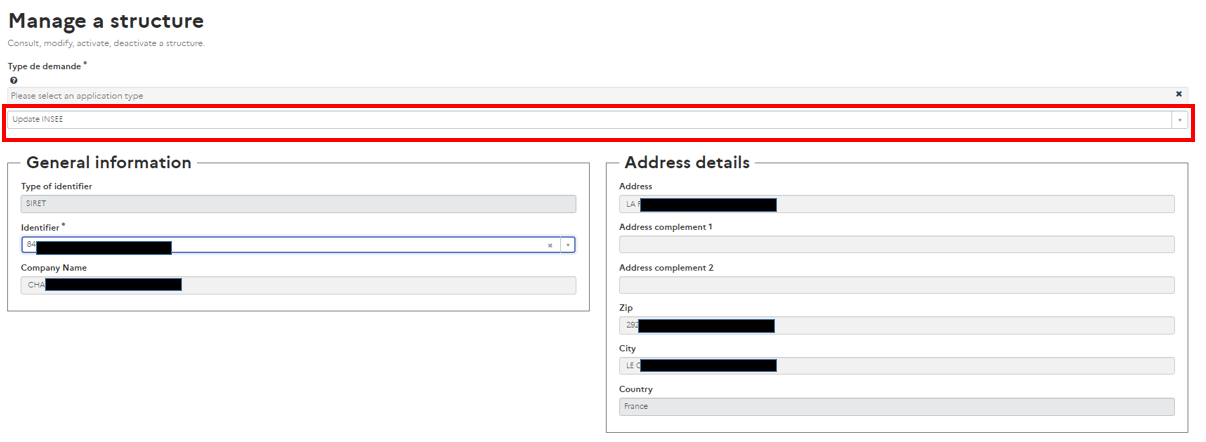
This feature allows you to update your structure from the INSEE database. If your identifier has changed since your registration, it will be updated. To do so, select « Update from INSEE database » in the type of request.
Then select the structure to be updated in the « Identifier » field.
Then click on « Submit » at the bottom of the page. A message will be displayed to confirm the changes. The modification will be effective after 30 minutes.
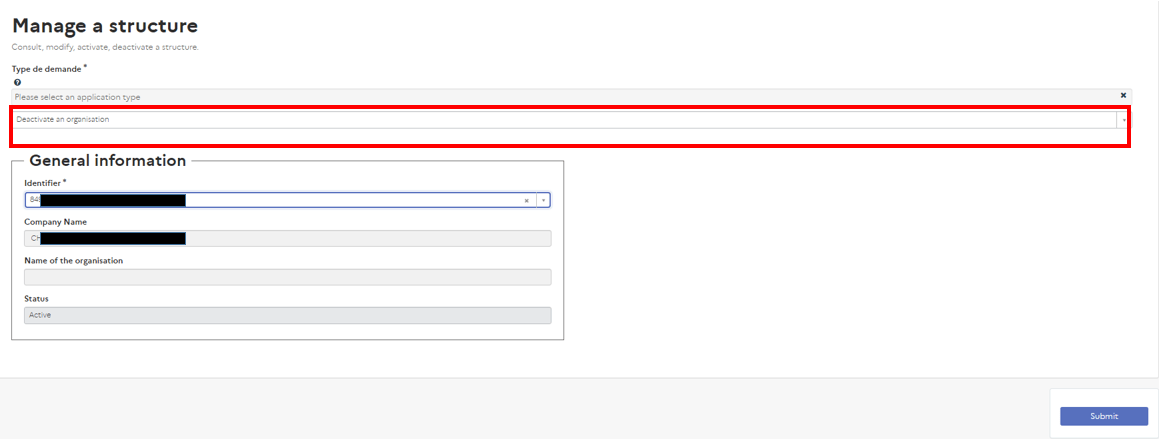
This feature allows you to request the deactivation of an active structure. To do so, select « Deactivate an organisation » in the request type.
Then select one of the structures in the « Identifier » field. The structures are all active.
Then click on « Submit » at the bottom of the page. A message will be displayed to confirm the changes. The modification will be effective after 30 minutes.
Step 1 : To manage a service, click on the « Manage a service » applications in the "Structures" area.
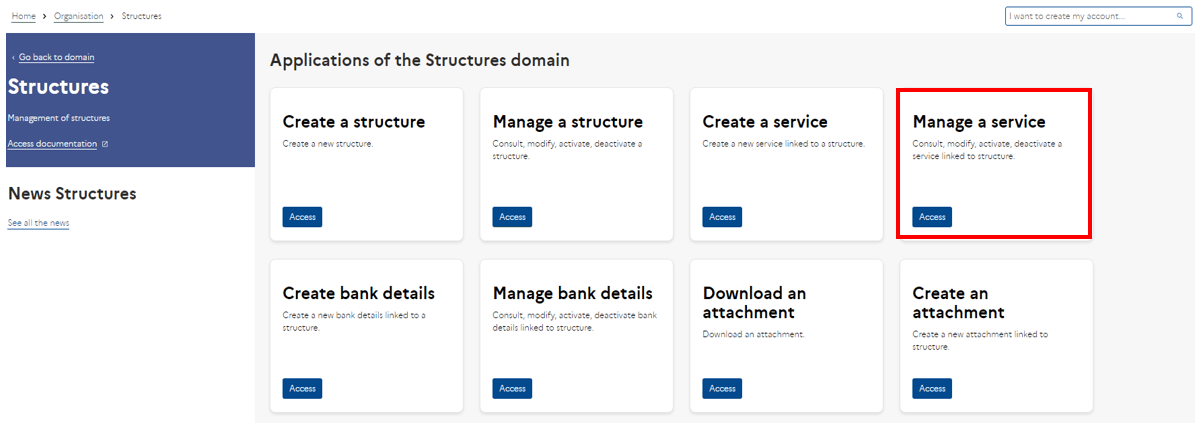
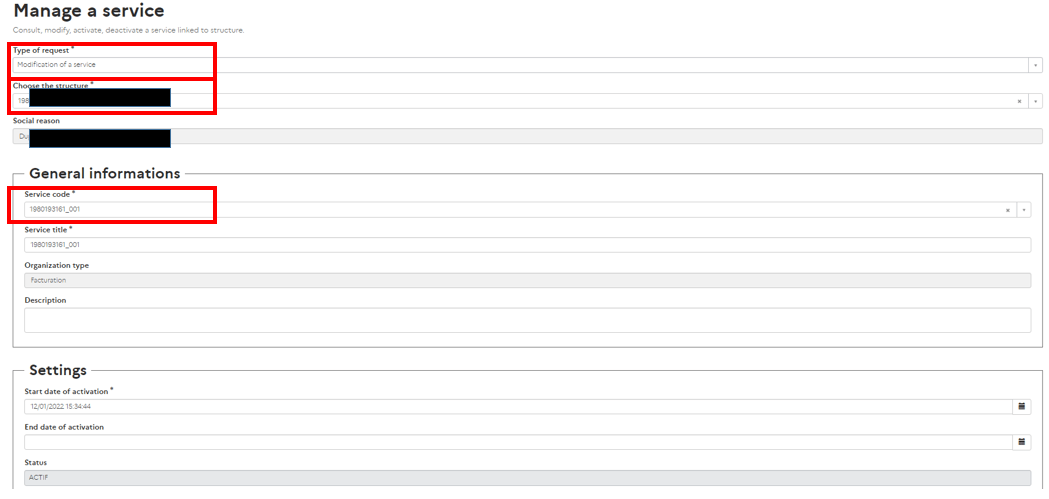
Step 2: In the « Manage a Service » application, select the type of request and structure, then select the service code in the « General Information » block. Finally, click on the « Submit » button at the bottom right of the screen.
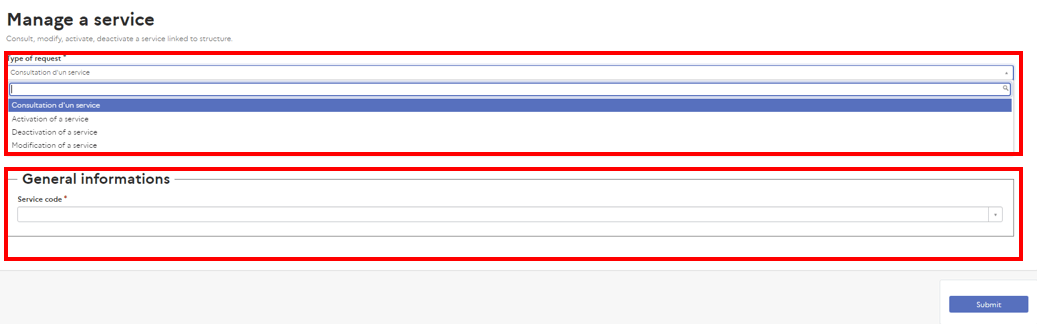
4 types of applications are possible :

- Consultation of a service
- Activation of a service
- Deactivate of a service
- Modification a service
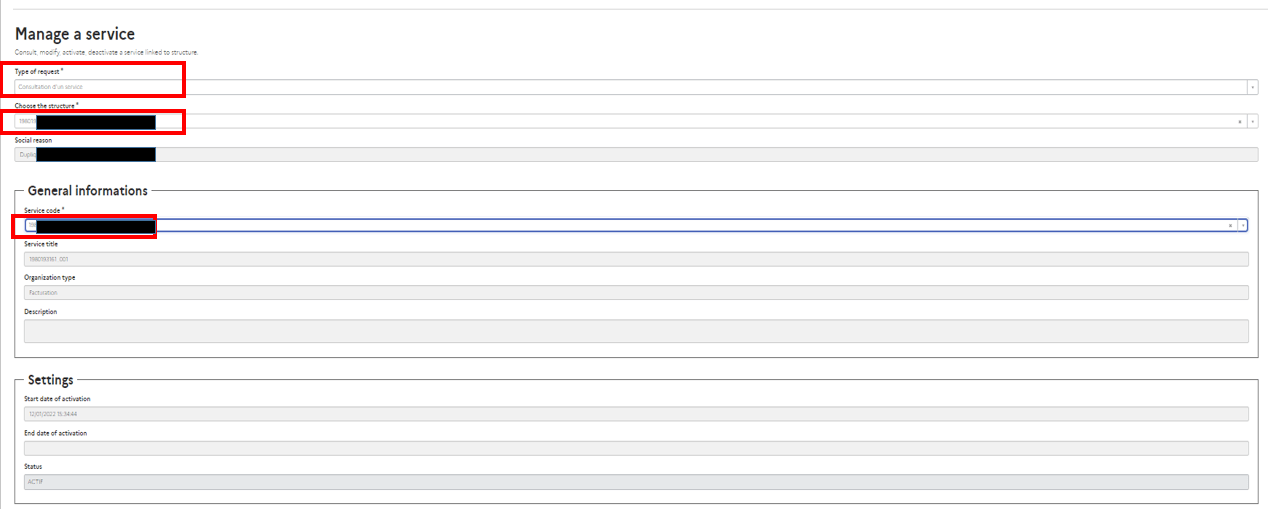
This functionality allows you to consult the information about a service without being able to modify it. To do this, select « Consult a service » in the request type.
Then select a structure in the « Choose structure » field, then select the desired service in the « Service code » field. All the information is displayed.
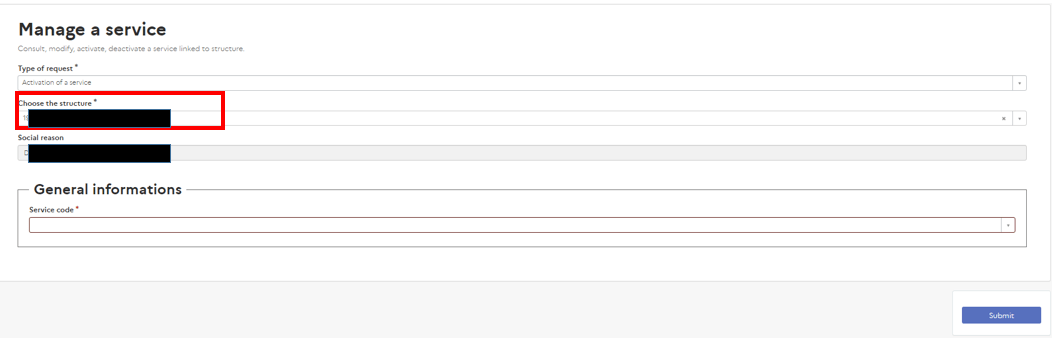
This feature allows you to activate a previously deactivated service. To do this, select « Activate of a service » in the request type.
Then select a structure in the « Choose structure » field, and in the « Service code » field, select one of the deactivated services. Then click on « Submit » at the bottom of the page to request the activation of the service. A message will be displayed to confirm the changes. The change will be effective after 30 minutes.
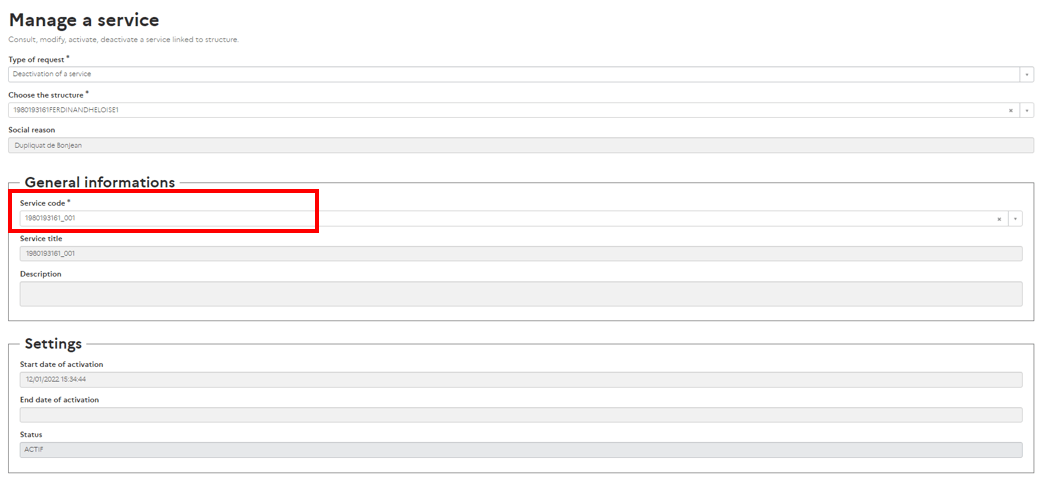
This feature allows you to deactivate a previously activated service. To do this, select « Deactivate a service » in the request type.
Then select a structure in the "Choose structure" field, and in the « Service code » field, select one of the activated services. Then click on « Submit » at the bottom of the page to request the deactivation of the service. A message will be displayed to confirm the changes. The change will be effective after 30 minutes.
This feature allows you to modify a previously activated service. To do so, select « Modify a service » in the request type.
Then select a structure in the « Select Structure » field, and a service in the « Service Code » field. Make changes in the unshaded fields.
Then click on « Submit » at the bottom of the page to request the service changes. A message will be displayed to confirm the changes. They will take effect after 30 minutes.
Step 1 : You can enter your bank details from the « Structures » area and the « Manage bank details » application.

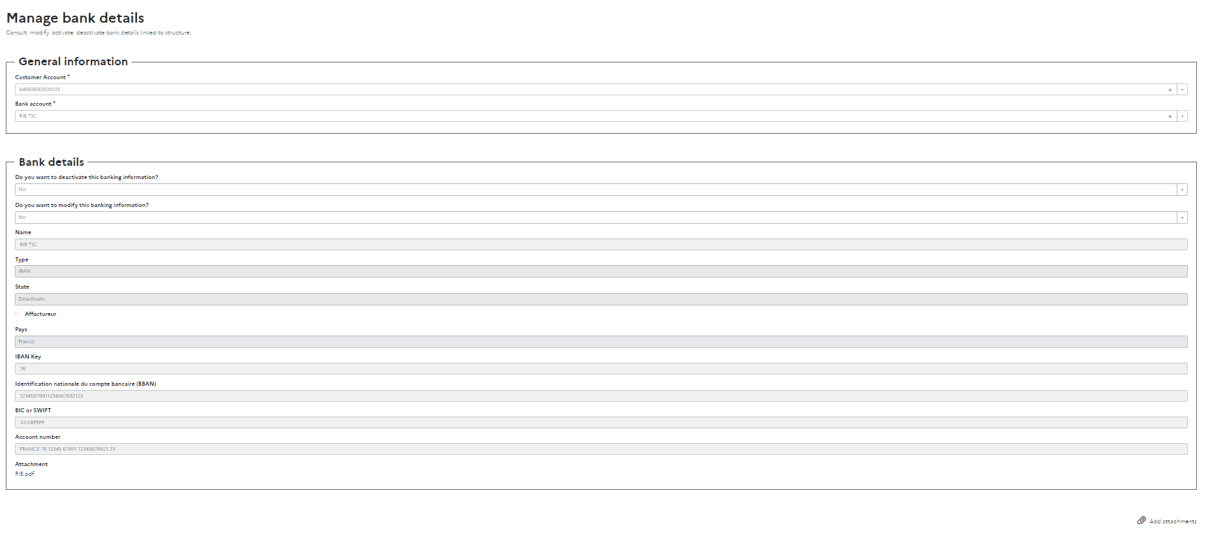
Step 2: In the « Manage bank details » application, select your structure and the associated bank account. Then fill in your bank details and finally click on the « Submit » button.
Step 1: From the "Structures" area in the "Organisation" area, you can upload an attachment to your structure from the "Create an attachment" application.
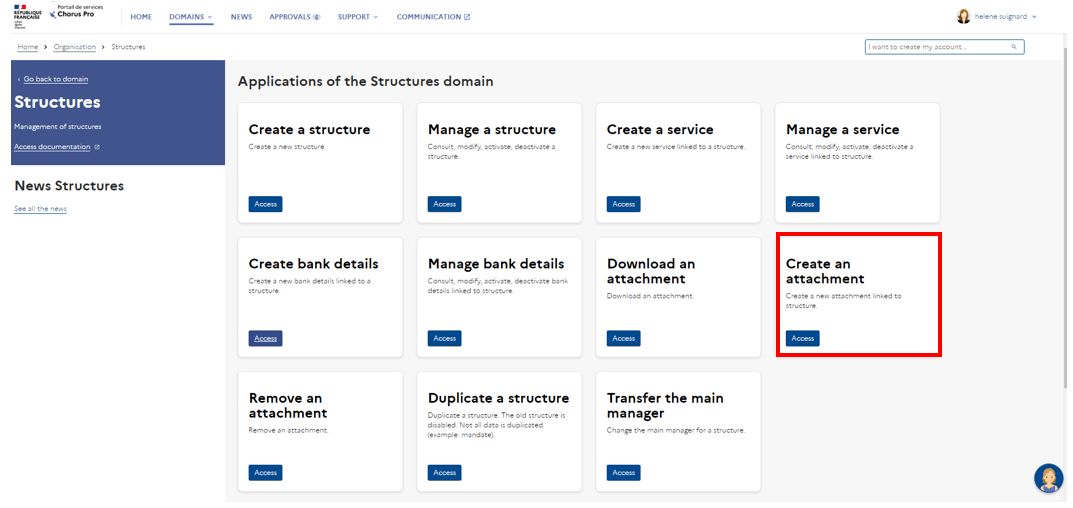
Step 2: In the "Create Attachment" application, select your structure and then click "Add Attachment" on the right side of the screen. You will then be able to select your attachment and add it to your account by clicking on the "Submit" button at the bottom left of the screen.
The steps to create an attachment are detailed in the "Create a Structure" page (Redirect to Create a Structure).
Step 1: From the "Structures" area in the « Organisation » area, you can upload an attachment to your structure from the "Upload an attachment" application.
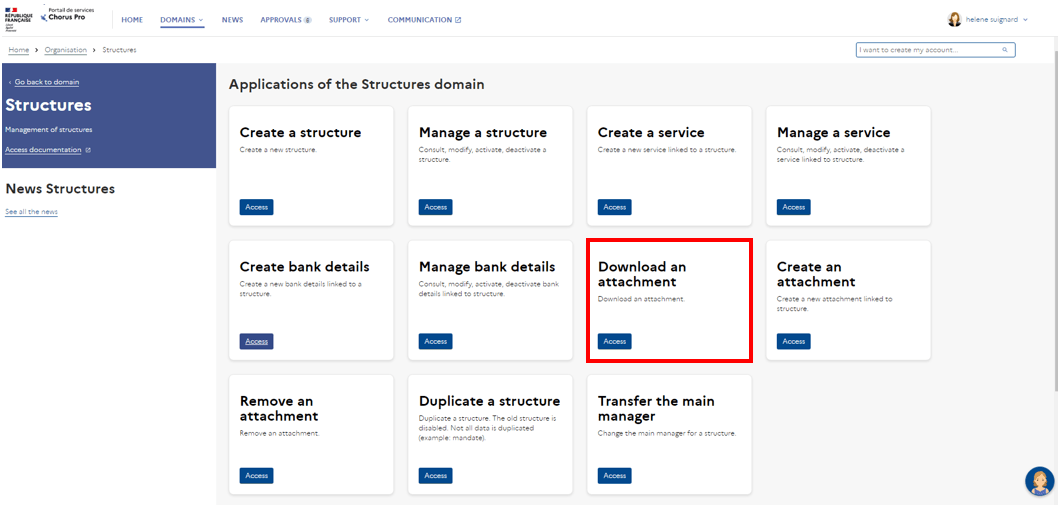
Step 2: In the « Upload an attachment » application, select your structure. The list of available attachments will appear. You will then be able to download an attachment added previously by clicking on the « Download » button on the associated line.

Step 1: From the "Structures" area, you can delete an attachment that you have already added to your structure from the "Delete an attachment" application.
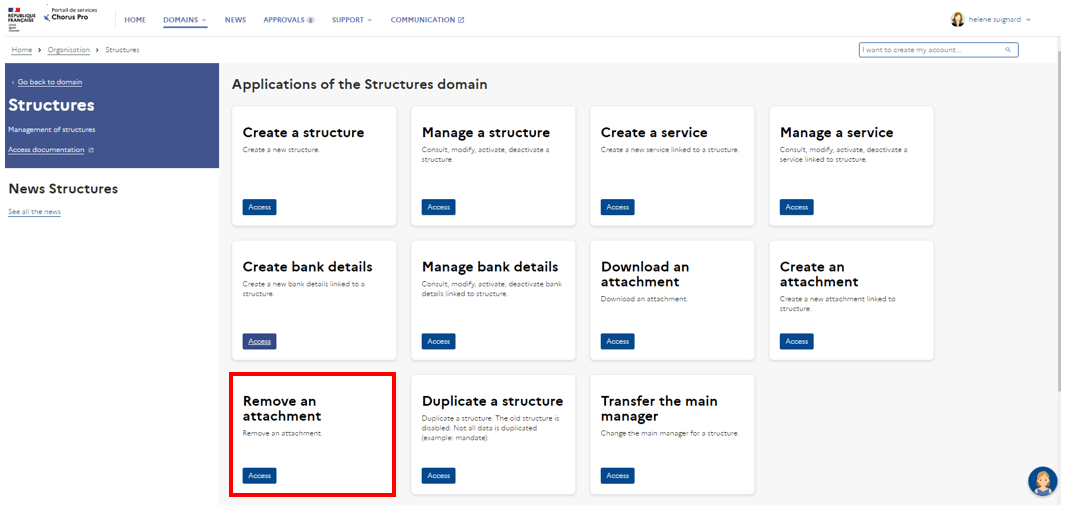
Step 2: In the « Delete an attachment » application, select a structure and then check the box below the "Actions" column. Finally, click on the « Submit » button.

Step 3 : You will be redirected to the « Structures » area and a green banner will appear at the top, in the middle of the page to confirm that the action to delete the attachment has been taken.
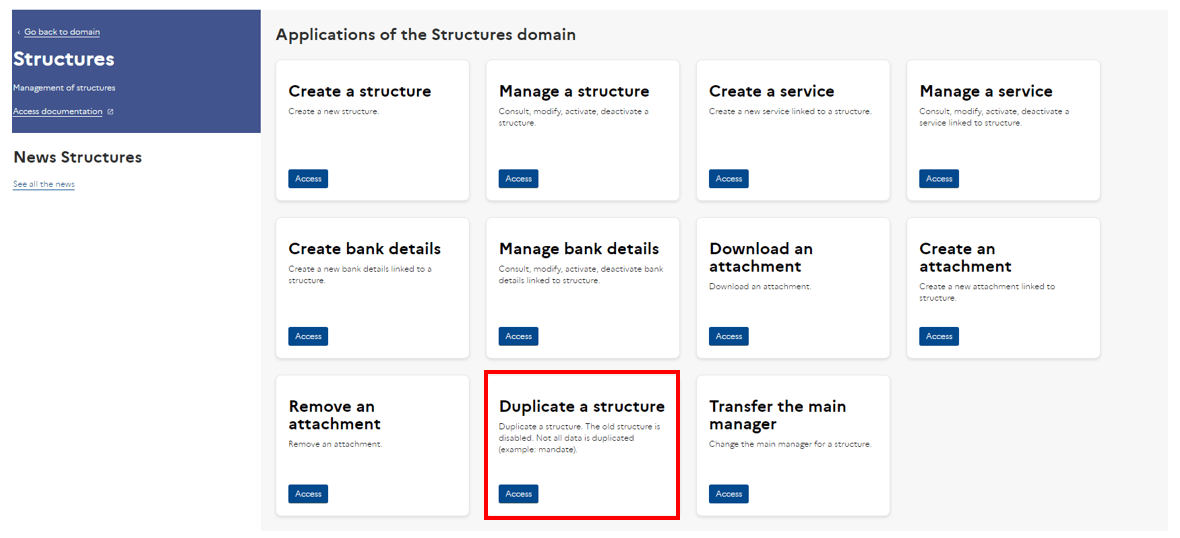
If you want to create a structure from an existing structure, you can use the "Duplicate a structure" application. All the data is taken over except for the billing mandate which is not duplicated. The old structure will then be deactivated. You will be able to modify the identifier and the information of the structure.
Warning : a duplicated structure will have the same structure type as the old structure. For example, a structure with a SIRET could only be duplicated as a structure with a SIRET.
From the "Structures" area, click on the "Duplicate a structure" application.
Step 1: In the application "Duplicate a structure", select a structure to duplicate from the drop-down menu "Old structure identifier".
Step 2: Indicate the SIRET of the new structure in the "Siret identifier" field.
The Chorus Pro service portal then checks that the SIRET exists in the INSEE database and that this SIRET is active. The general information as well as the postal address automatically included. You can modify the new name of the structure, the email address and the telephone number.
If the SIRET entered corresponds to an entity with the status "Closed" in the INSEE database, it cannot be created in the Chorus Pro service portal.
Step 3 : Finally, click on the "Submit" button. You will be redirected to the "Structures" area and a green banner will be displayed at the top to confirm that the action has been taken into account.

2. Transferring the role of the main manager
The main manager has all the rights to all the functionalities that allow him to modify the parameters of a structure. By default, the main manager of the structure is the first person to create the structure in Chorus Pro.
If the main manager leaves the structure, he/she must transfer his/her role to another user before leaving.
The new main manager is to be selected among the users already attached to the structures.
Here are the steps to follow to transfer the role:
Step 1: From the "Structures" area of the "Organization" area, you can transfer the role of the main manager of your structure from the "Transfer the main manager" application.
![]()
Step 2 : In the « Transfer the Main Manager » application, select the relevant type of request :
-Unit transfer: transferring the role of the main manager of each structure to different users ;
-Bulk transfer: transferring the role of the main manager of all your structures to a single user ;
-Partial bulk transfer: transferring the role of the main manager of several structures to a single user.
![]()
The main manager wants to transfer his role of each structure to different users.
Step 1 : Select the structure to be transferred using the pencil to the left of the structure
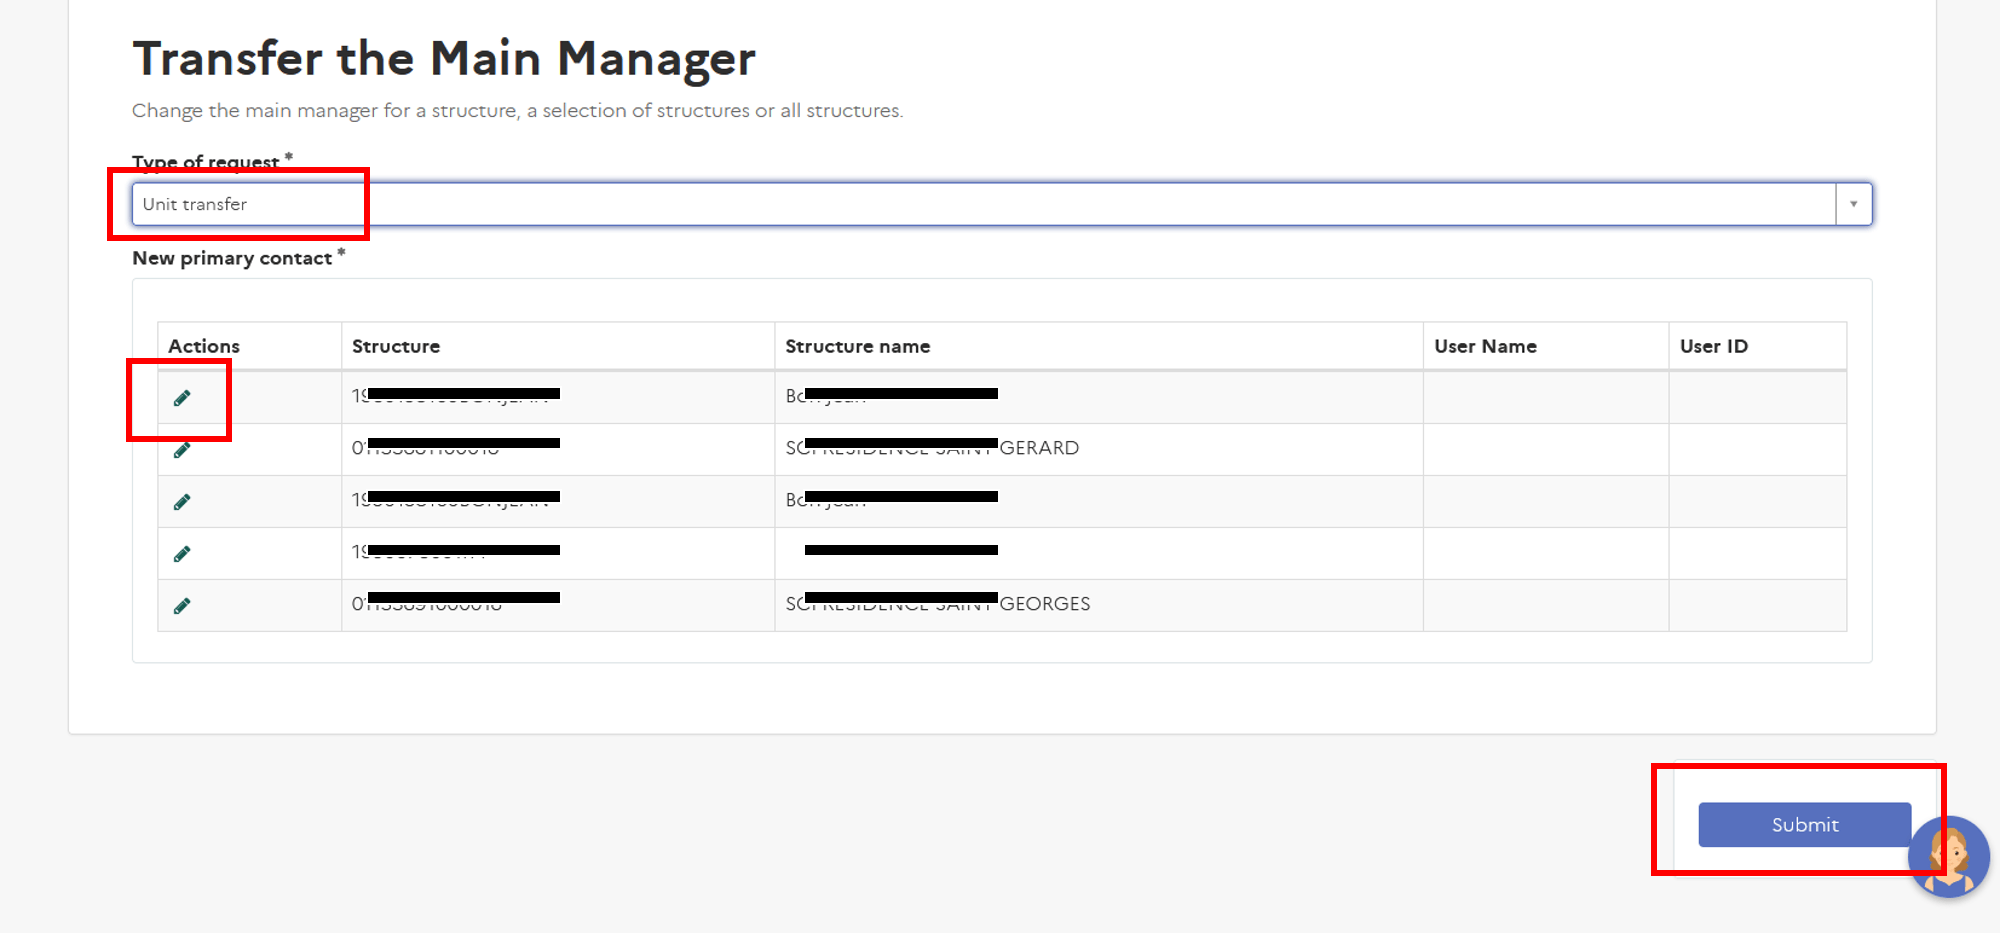
Step 2: A window appears. You can then select the name of the user who will become the main manager of the structure. The user ID field will be updated automatically. Validate your choice by clicking on "Save".
![]()
The main manager wants to transfer his role for all his structures to a single user.
Select the name of the user who will become the main manager of the structures. Confirm your choice by clicking on "Submit".
![]()
The main manager wants to transfer his role for several structures to a single user.
Select the relevant facilities using the drop-down menu. Add the name of the user who will become the main manager of the structures. Confirm your choice by clicking on "Submit".
![]()
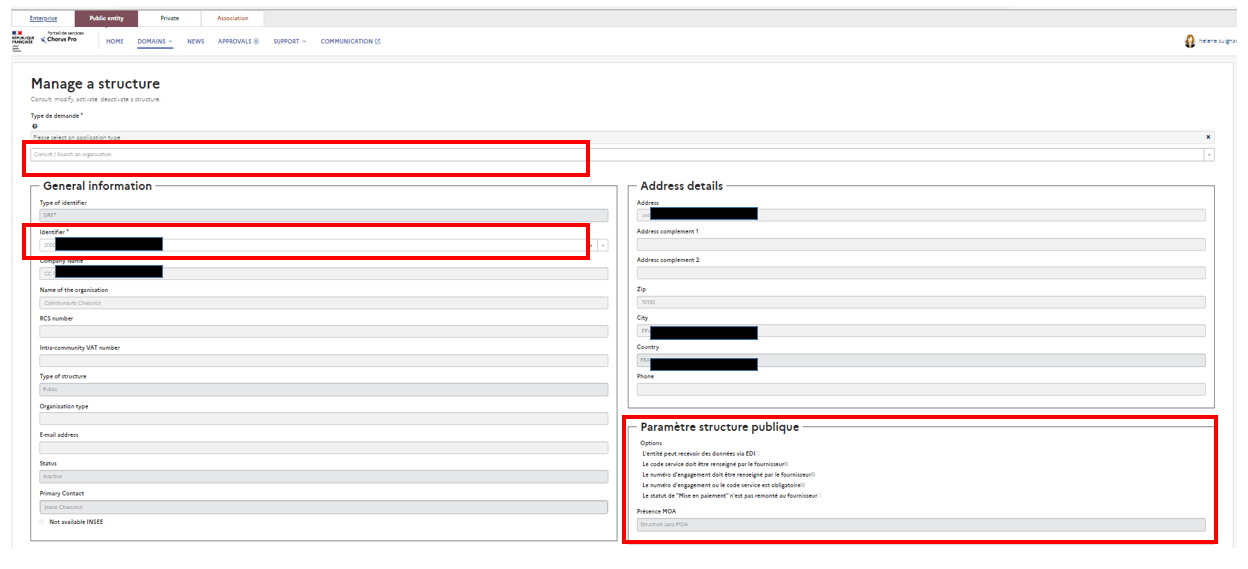
3. Specificities of public entities
Public entities have the following additional parameters to manage the reception of invoices via chorus pro :
- Public entity can receive data via EDI : If this box is checked, it means that the public entity can receive invoices and billing documents by batch via the electronic data interchange (EDI) protocol.
- The service code must be filled in by the supplier : If this box is checked, it means that all suppliers must fill in a service code in order to send an invoice to this public entity;
- The commitment number must be filled in by the supplier : If this box is checked, it means that all suppliers must fill in a commitment number in order to send an invoice to this public structure ;
- The commitment number or the service code is mandatory: If this box is checked, it means that all suppliers must fill in at least one of the two pieces of information (service code or commitment number) to be able to send an invoice to this public structure;
- The status "Payment in progress" is not sent to the supplier : If you check this box, you will prevent the supplier from having access to the status "Payment in progress" when the invoice is paid.
- This parameter allows you to identify for a public structure the presence of the project owner and, consequently, how the reception of the work invoices will take place.
These parameters can be consulted and modified via the "structures" application in the "organization" domain.
When you are in the "Manage a structure" application, select the "View / Search a structure" or "Modify a structure" request type. Then select your entity in the Identifier drop-down menu.
- If you have selected "Consult / Search a structure", the parameters of your public structure can be consulted but you cannot modify them.
- If you have selected "Modify a structure", you can set up your structure by checking the boxes in the "Public structure parameters" block and then click on "Submit" at the bottom of the page to confirm.
You will be redirected to the "Structures" area and a green banner will appear at the top to confirm that the action has been taken.
When you are in the "Manage a service" application and you have selected the type of request "Consultation of a service", you can make the commitment mandatory by checking the box indicating "The commitment number is mandatory" in the "Settings" block.

Click on "Submit" at the bottom of the page to confirm. You will be redirected to the "Structures" area and a green banner will appear at the top to confirm the action.
Primary or secondary managers in the public sector outside the State are required to have a PIGP (Public Management Internet Portal) account to connect to Chorus Pro. Consequently, if the future main manager does not have a PIGP account, you will not be able to transfer the rights of main manager to him/her.

Last Update: June 28, 2022