

"My messages" area allows you to send general communications from the Chorus Pro portal. Messages can be sent by a public client to its suppliers (private or public) and vice versa.
A message can be sent to one or more recipients if at least one invoice has been sent between them.
A message is sent one way (no response possible from a received message).
The "My messages" application does not replace the support portal which remains dedicated to exchanges between customers and suppliers for problem solving and questions related to invoices.
Click on the "Communication" application to access the inbox of mailbox on your structure / service:


1.You can consult the list of received messages. The attributes of a received message are:
- The date of reception
- The title
- The issuing structure
- The reference
- The contents
2. It is possible to apply a filter to the list of received messages by sending structure or by recipient structure (if you have subscribed to the My messages space on several structures). After selecting a structure from one of the two drop-down lists, click "Apply" to filter your messages.
Click on the "Outbox" tab to view your sent messages and create new messages:
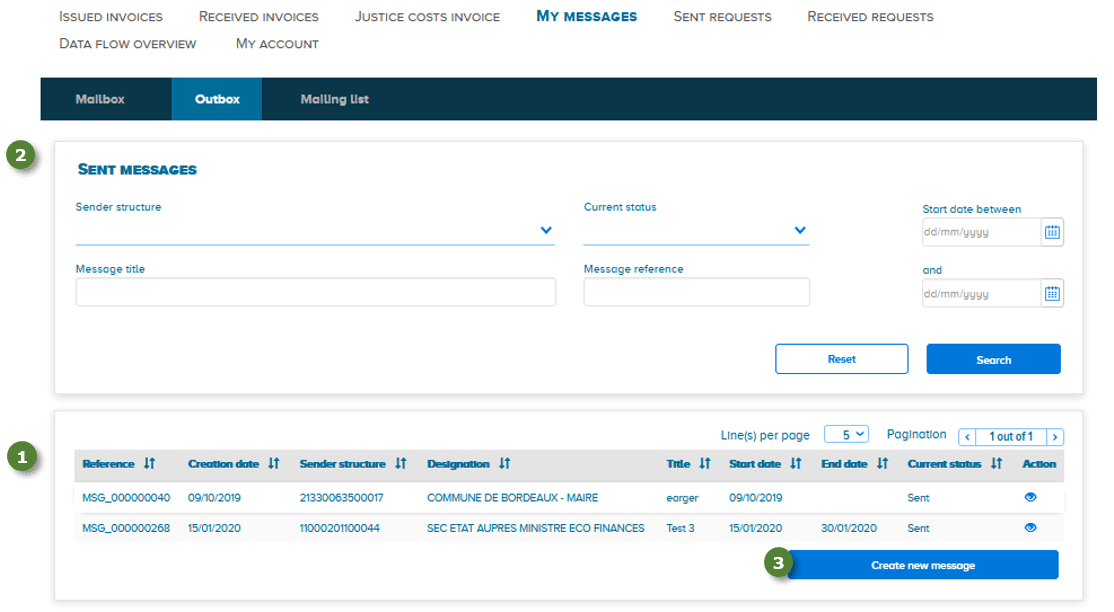
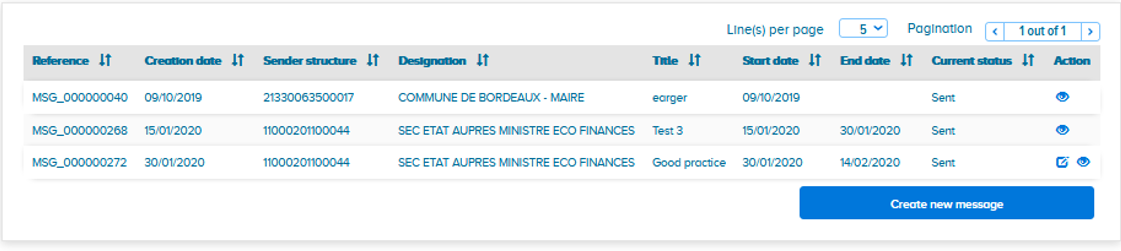
1.The list of sent messages contains for each message:
- The reference
- The date of creation
- The identifier (SIRET) of the issuing structure
- The designation of the issuing structure
- The title
- The start and end dates of the message display for recipients
- The status of the message. A message may be in the "Sent" or "Draft" state (the message has been saved but has not been sent to recipients)
2. It is possible to filter the list of sent messages by structure sending the messages, by their current status, by title, by reference or start and end date of display. Several filters can be applied simultaneously. After entering the filter (s) you wish to apply, click on "Search". To redisplay the list containing all sent messages, click on "Reset".
3.To create and send a new message, click on "Create a new message".
The following form appears when creating a new message. The fields marked with an * must be completed to allow the message to be sent.
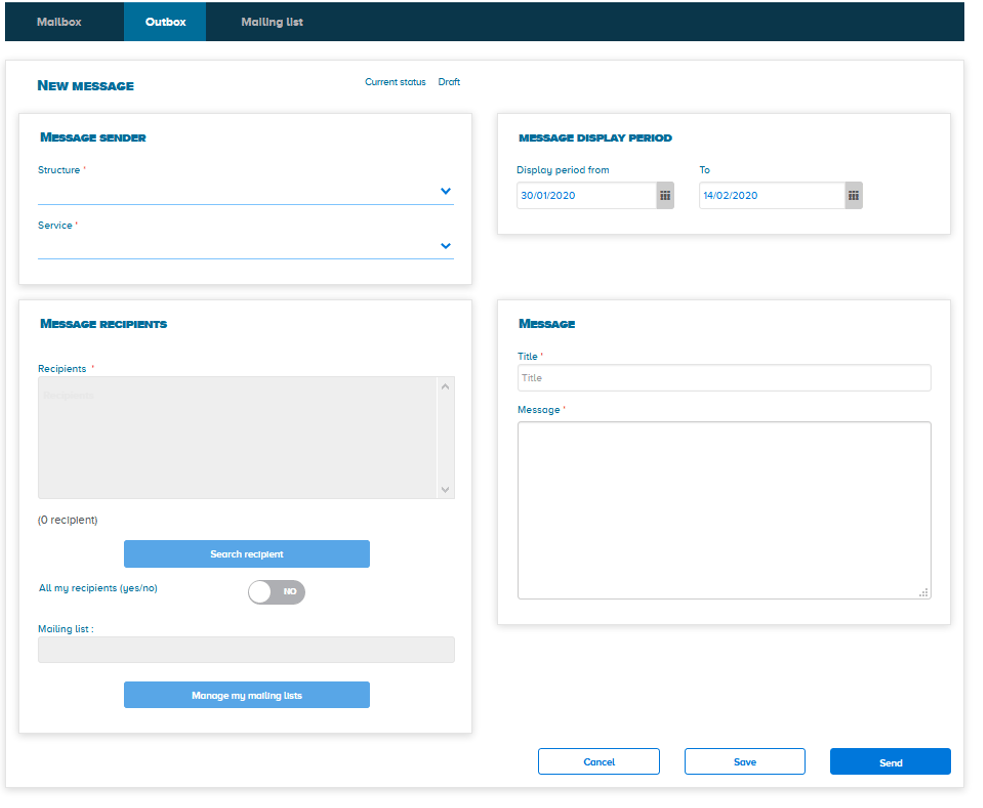
Area « message sender » :
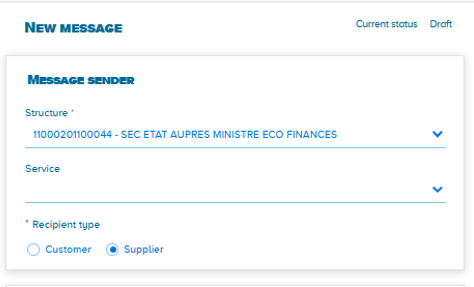
A drop-down list allows you to display the structure sending the message. Adding the sender service code is optional.
For public entities only: a check mark must be filled in to designate the type of recipient (customers or suppliers).
Area « Message recipients » :
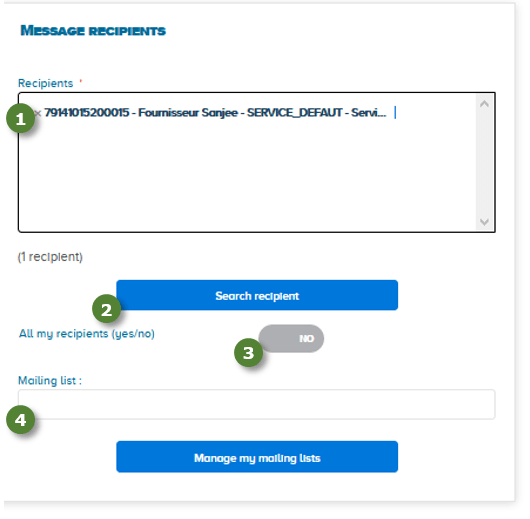
- The recipient (s) can be indicated by their SIRET in the "Recipients" block. An automatic selection is proposed by autocompletion from 4 characters. The selection list includes, where applicable, the services with which the issuer has already exchanged invoices.
- The "Search recipients" button returns to a search screen allowing you to directly find and add a recipient.
- If the check mark "All my recipients" is changed to "Yes", the message will be sent to all the structures with which the issuer has exchanged invoices.
- You can specify one or more mailing list (s) as recipient (s) if you have created one.
Area « Message display period » :
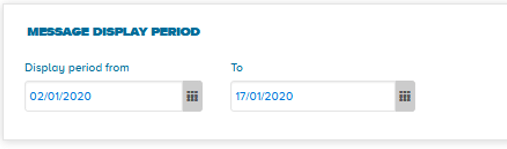
Adding start and end dates for the message display for the recipient (s) is mandatory.
By default, the display start date is that of the day the message is created (D). The end date is D + two weeks.
Area « Message » and saving / sending the message :
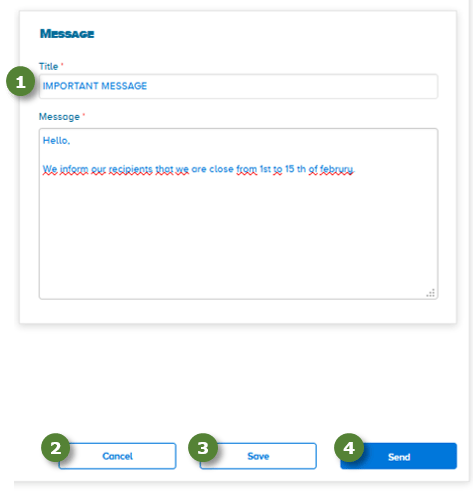
- The title and the content of the message are free fields. The number of characters is 50 for the title and 2000 for the content.
- The "Cancel" button allows you to return to the screen for viewing sent messages.
- The "Save" button keeps a message in its Outbox in the "Draft" state. The user can complete their message later, before sending it.
- The "Send" button allows you to send the message once all the required fields have been completed.
Several actions can be performed on created messages. To do this, access the list of messages in the outbox, column "Action":
All created messages can be viewed by clicking on ![]()
Messages can be changed by clicking on ![]()
-All the fields can be modified for messages in the "Draft" status. Once you've made changes to the message, you can send it to the recipient (s) or save it to keep it as a draft.
-For messages in the "Sent" state, it is possible to modify the display dates, except for the start date if it is less than today's date. New recipients can be added in the "New recipients" field. Once the information has been modified, click on ![]() so that the changes are taken into account and visible to the recipient (s).
so that the changes are taken into account and visible to the recipient (s).
-
-Messages in the "Sent" state whose display finish date has expired cannot be modified.
Messages in the "Draft" state can be deleted by clicking on 
A message can be sent to one or more recipient list (s) previously created. The "Mailing lists" tab is dedicated to the creation and management of these lists.
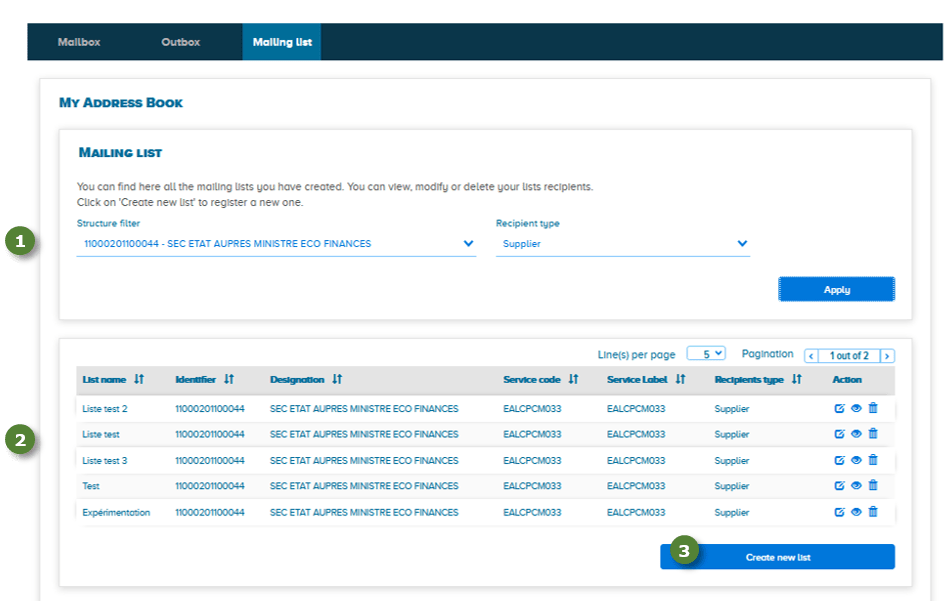
- It is possible to filter the distribution lists already created by structure and by type of recipient.
- The results table displays the mailing lists already created. The icons in the "Action" column allow you to:
![]() Modify a mailing list (add or delete recipients, modify the list name)
Modify a mailing list (add or delete recipients, modify the list name)
![]() Consult a mailing list
Consult a mailing list
![]() Delete a mailing list
Delete a mailing list
3. To create a new mailing list, click on "Create a new list"

Last Update: September 14, 2022