

Introduction
There are five simple steps to creating your user account :

Steps to create an account
Access the Chorus Pro service portal at https://chorus-pro.gouv.fr and click on "Create an account" at the top right of the home page

You will then be redirected to the account creation form.

Fill in the information on the "Personal Information" form:
- Email address,
- First and last name,
- Phone number,
- Contact e-mail adress - you will receive notifications from the Chorus Pro service portal at this address,
- Check the box "I accept the conditions" if you agree to transmit your personal information to the Minister for the Budget.
- To finalise the creation of your account, repeat the sequence of characters at the bottom of the screen and click on "Validate Captcha".
- Finally, click on the "Create my account" button at the bottom of the screen.
Required fields are marked with a red asterisk.
The summary screen below appears:
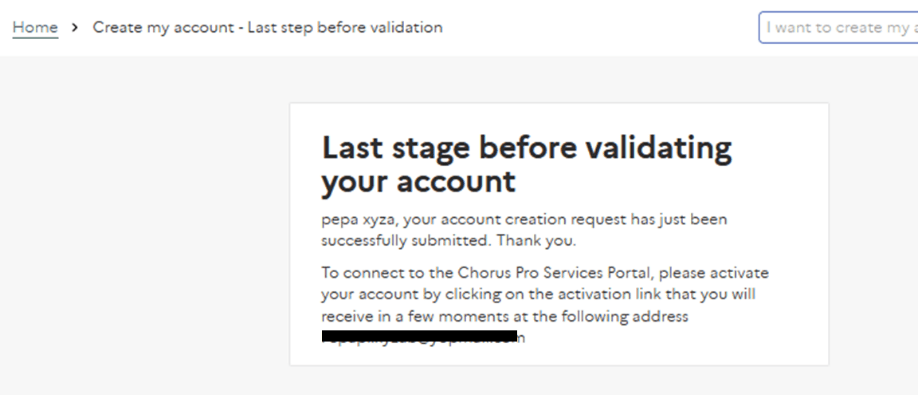
An email containing an activation link will then be sent to the email address given in the personal details section to complete the creation of the account.
Access the Chorus Pro service portal at https://chorus-pro.gouv.fr and click on "Create an account" at the top right of the home page
You will then be redirected to the account creation form.
Fill in the information on the "Personal Information" form:
- Email address,
- First and last name,
- Phone number,
- Contact e-mail adress - you will receive notifications from the Chorus Pro service portal at this address,
- Check the box "I accept the conditions" if you agree to transmit your personal information to the Minister for the Budget.
- To finalise the creation of your account, repeat the sequence of characters at the bottom of the screen and click on "Validate Captcha".
- Finally, click on the "Create my account" button at the bottom of the screen.
Required fields are marked with a red asterisk.
The summary screen below appears:
An email containing an activation link will then be sent to the email address given in the personal details section to complete the creation of the account.
You have 60 minutes to activate your account.
After clicking on the activation link in the email, you will then be able to set a password to secure access to your account, making sure to respect the security rules requested:
- 12 characters minimum,
- 3 types of characters minimum among the 4 following types: upper case, lower case, numbers, special characters.
Finally, click on the "Submit" button.
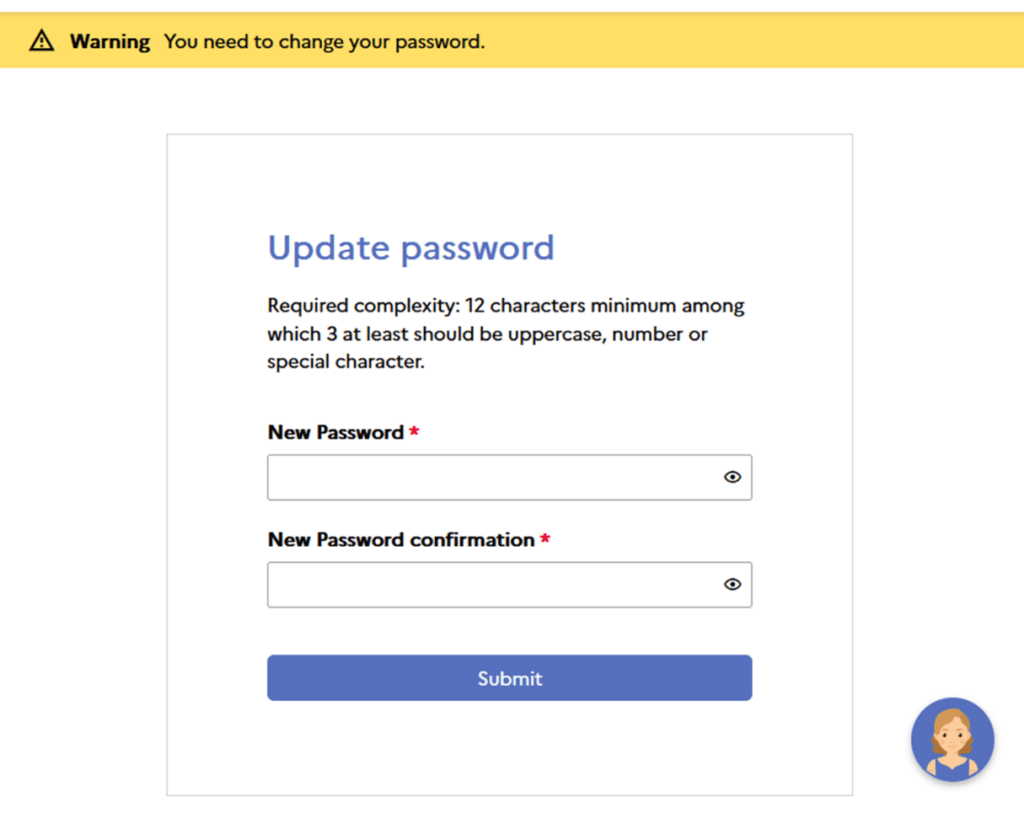
Confirmation that the password has been updated is displayed.
A structure in Chorus Pro corresponds to a legal entity (company, association, etc.) uniquely identified by its SIRET number or another type of identifier for the following structures
- European outside France
- Outside the European Union
- With RIDET
- With TAHITI number
- Of a particular type
To be able to access the various Chorus Pro functionalities, all users must be attached to their structure (to a public or private entity).
The "Information on the structure" form allows you to fill in information about the entity for which you work.
As a reminder, if you are a supplier and you create your account, you do not have to enter the SIRET number of your public customer, but rather the information relating to your company.
Log in with your login address and password. A window will appear offering you two choices. You can create a new structure or attach your account to an existing structure.

Once you have chosen the "Create a new structure" action, the "Structure information" form allows you to enter information about the entity for which you work.
As a reminder, if you are a supplier and you are creating your account, don’t fill the field « Siret identifier » with the SIRET number of your public customer but rather the information relating to your company.
Enter your identifiant in the identifiant field.

If no structure has been created with the SIRET on Chorus Pro, you will start filling in the information to create the structure. Otherwise, if a structure with the same SIRET exists on Chorus Pro, the message "This structure is already present in Chorus Pro" will be displayed. You will therefore need to request an attachment.

A structure on Chorus Pro is attached with the SIRET, so you need to request a link.
For more details, see the "Request an annexation" chapter on the "Manage your user account" page ».
If the SIRET of your company was indicated as non diffusible at the time of its registration with the INSEE, the following information will not appear in the form:
- Address
- Additional address 1
- Additional address 2
- Postal code
- Country
- City
and the box "Not diffusible" is checked.
In most cases, accounts associated with public-sector entities are created by information flowing directly from the management software (e.g. Helios).
In the case of public structures whose accounting is managed outside of Helios, and which do not yet have the Chorus Pro service portal, the procedure is the same as that described in this guide, with an additional step: the creation of the structure must be approved by the Chorus Pro service portal support.
Once the account has been created, the following emails will be sent to you to follow the process through to the end:
- An email summarizing the account creation information and reminding you how the process works,
- An email informing you of the validation or refusal of the request to create a public structure,
- If the request to create a structure has been approved, you will receive an email containing an activation link allowing you to finalize the creation of your account.
These emails will be sent to your login email address and you have 60 minutes to activate your account (for more details follow the procedure described in chapter 4 "Activating your account with an activation link").
Certain actions performed on the user account trigger notification emails sent to the user's contact email address entered in the "My Account" section.
The table below provides a summary of the types of notifications associated with the user account:
| Trigger factor | Notification |
| Creating a user account | User account creation summary email sent to the user's login email address |
| Processing a request to be attached to a structure when creating an account | Email indicating the validation or refusal of a request to be attached to a structure when creating a user account |
| Finalizing the creation of a user account | Account activation email sent to user's login email address |
| Registering change of contact address | Change of address email sent to the user's old and new contact email addresses |
| Request for password reset | Email containing a link to reset a user's account password |
Make sure that the email is not in the "Spam" box of your email. If it is not there, you have three options:
Click on "Log in" in the upper right-hand corner of the Chorus Pro services portal home page. Click on "Forgot your password?" and enter your login email address. To finish, click on "Submit". You will be redirected to the Chorus Pro services portal home page.
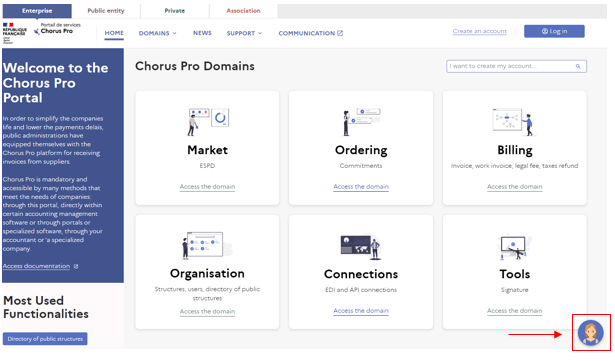
Click on the icon on the Service Portal home page. A conversational window will appear, where you can indicate "I am having problems connecting" and then "I did not receive the activation email".
If you are dissatisfied with the answers provided by the virtual assistant Claudia, you can send a request for help to the support team. To do so, click on the 'Contact us' link on the Chorus PRO services portal and access the following page :

Then click on "Submit a ticket" and select the situation that corresponds to the problem you are experiencing. In this case, it is a "Connection problem".

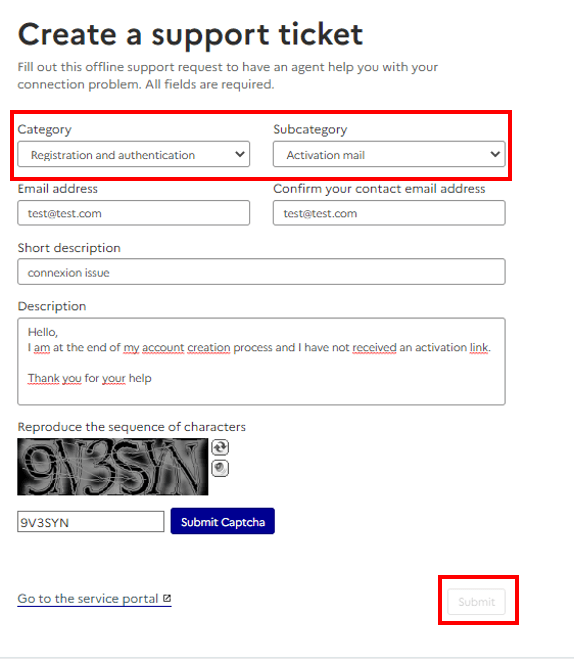
Finally, click on "Create a support ticket" and fill in the different fields as shown in the following screenshot. Once the fields are filled in, reproduce and validate the sequence of characters that you will see when you enter your ticket. Then click on the "Submit" button to send your request to support.
If the activation email has expired, a message will appear on the screen informing you that the password initialization has failed.
Account activation links are valid for 60 minutes.
After this time, you must reapply via the 'Reset Password / Forgot Password' procedure.

Last Update: January 24, 2024