

Introduction
The Chorus Pro qualification portal allows you to connect to a sandbox environment similar to the production environment in order to get familiar with the solution and develop your skills before invoicing on the "real" Chorus Pro".
In this environment, you can use the main functionalities of Chorus Pro : invoice submission, processing and search, area management, data flow overview, etc.
The navigation system is identical to the Chorus Pro service portal. All the navigation requirements are described on the page: Getting familiar with navigation on the Chorus Pro service portal
In this environment, it is possible to use the main functionalities of the Chorus Pro service portal: filing, processing and searching for invoices, monitoring flows, etc.
For organizations wishing to implement a technical connection to Chorus Pro, the qualification portal offers the possibility of connecting to a qualification environment to perform the necessary technical tests.
Within the framework of a connection project, the qualification portal allows you to:
- Make an EDI or API connection request,
- To send flows to the qualification environment,
- Receive flows from the qualification environment,
- Make API calls,
- Follow the flows sent by EDI or API.
In addition to these functionalities, the qualification portal has a function for testing incoming and outgoing formats.
The private and public structures used for the tests are provided via a dataset.
1. First steps
The qualification portal is accessible by all entities at the following address : https://qualif.chorus-pro.gouv.fr/aife_qual
This portal is distinguished by the buttons on the menu bar, the login button on the top right and the brown virtual assistant Claudia on the bottom right.
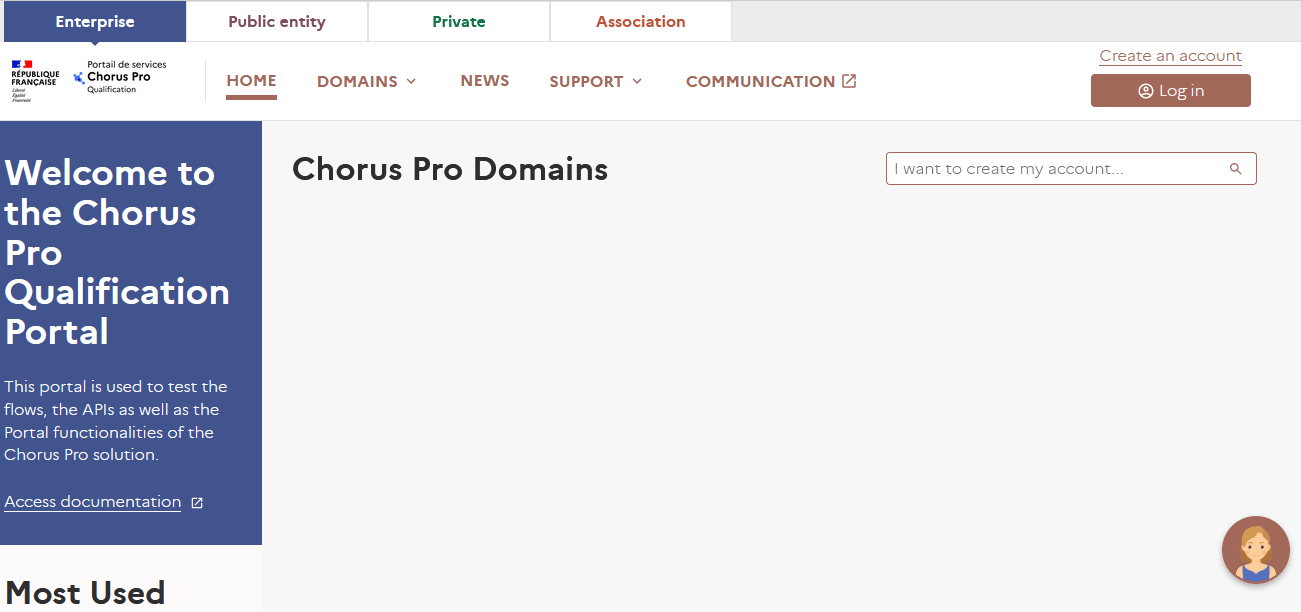
Please note: In offline mode, the qualification portal homepage is empty and does not show any domains as shown in the screenshot above. In order to access the domains, it is necessary to log in or create a user account.
The use of the qualification portal requires a dataset. A dataset is a file containing dummy data for logging into the portal and using its functionality.
All tests performed on the qualification portal must be based on the information in the dataset.
Note that it is not possible to create a structure on the qualification portal; the structures used must be those in the data mat.
The process of connecting to the qualification portal to run a test is done in three steps detailed below, they will be described in the next chapters:
- Creation of the user account
- Generation of a dataset from the user account
- Connect to the portal using the information from the dataset
Please note: The user account created in step 1 is only used to retrieve the dataset. Once it has been downloaded, the connections are made from the data it contains.
To create a user account, click on "Create an account" at the top right of the home screen.
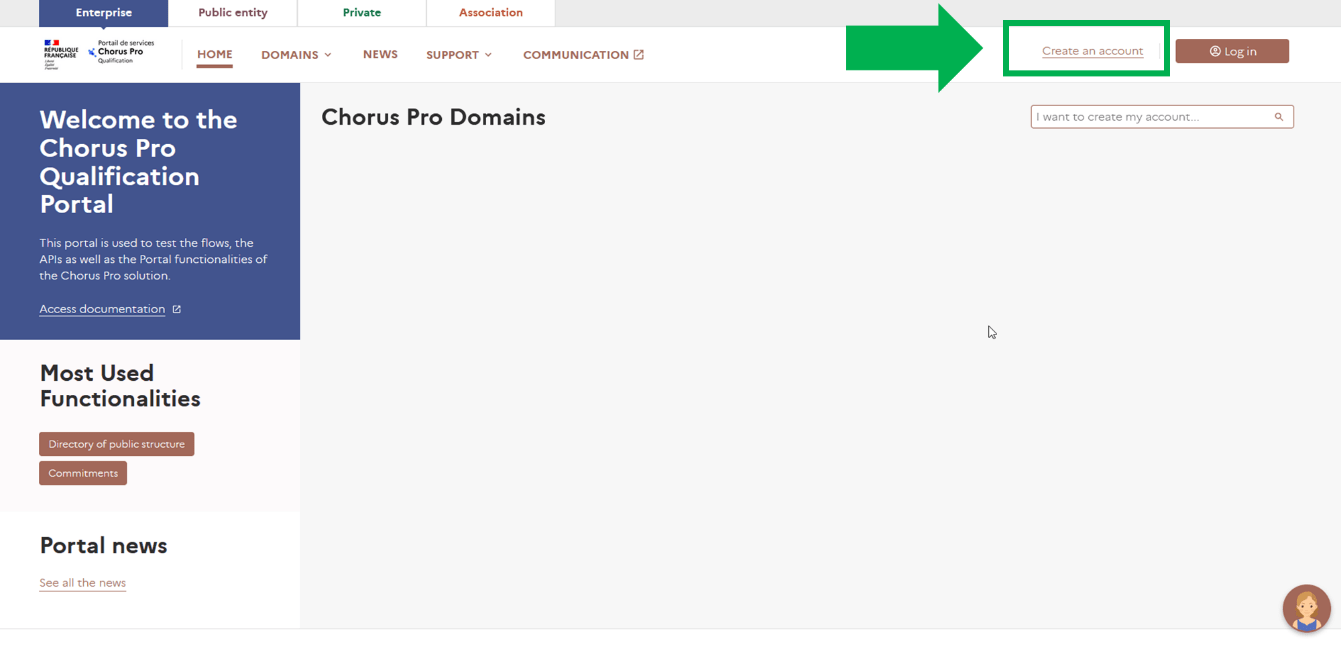
This will take you to the account creation page.
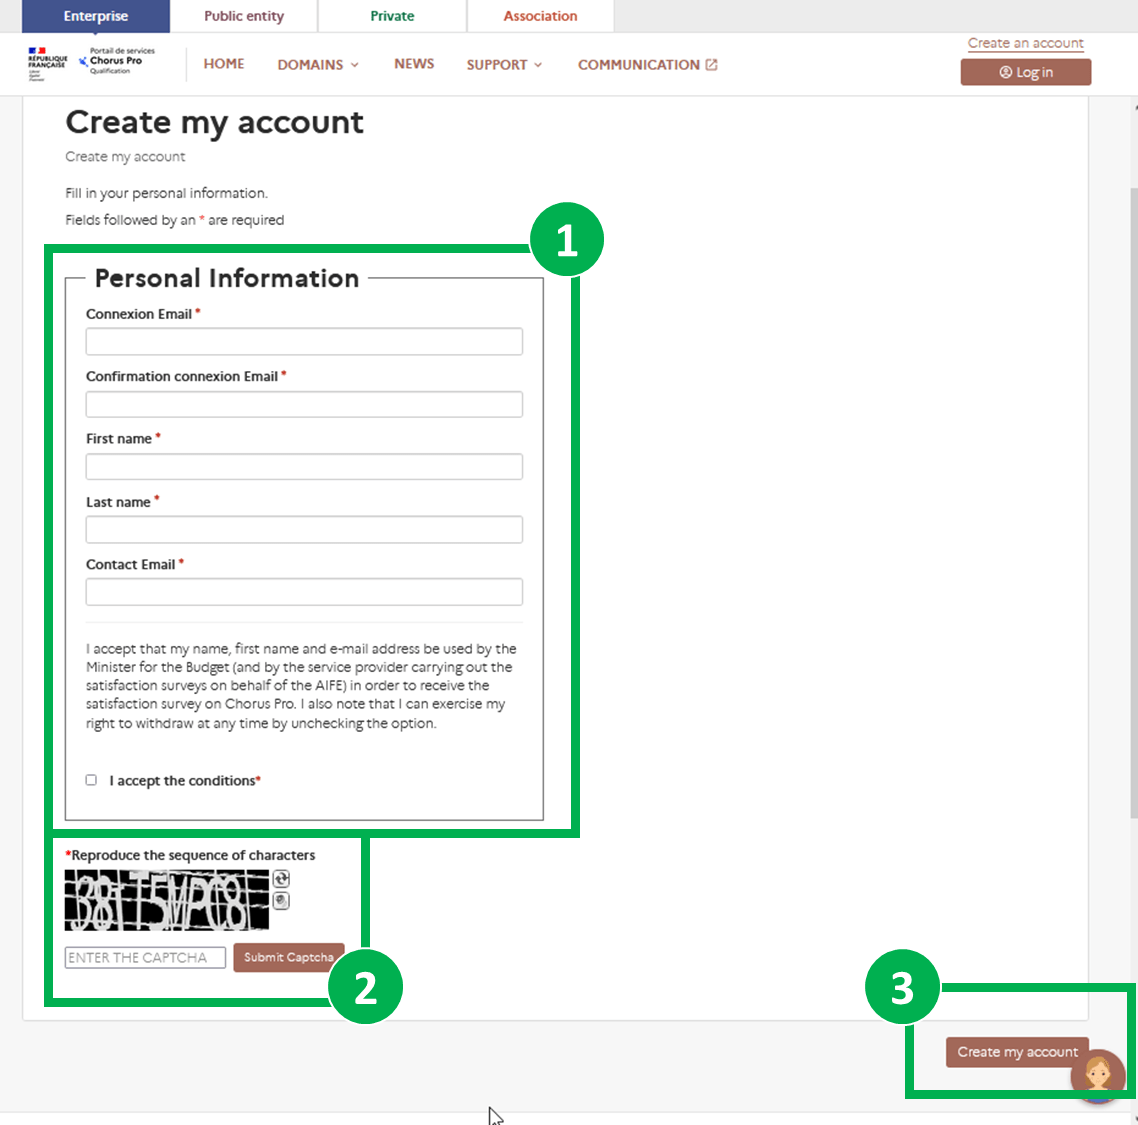
Fill in the information requested in the "Personal Information" form (1).
Enter the Captcha at the bottom of the form, and click on "Validate Captcha" (2).
To finish, click on "Create my account" at the bottom right of the screen (3).
The following message will appear on the screen to confirm that the account creation request has been taken into account:
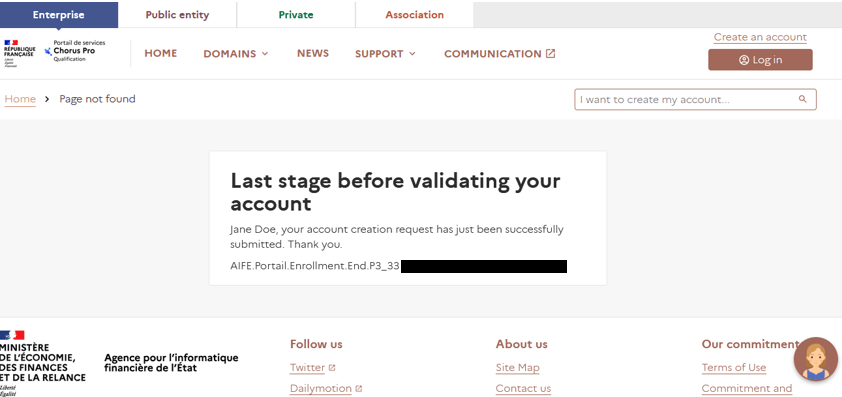
As mentioned in the summary, once your account is created, an activation link is sent to the email address you provided. To finalize the creation of your account, you just have to click on this link.
You will then be redirected to the user account activation page. This step allows you to secure access to your account by setting a password.
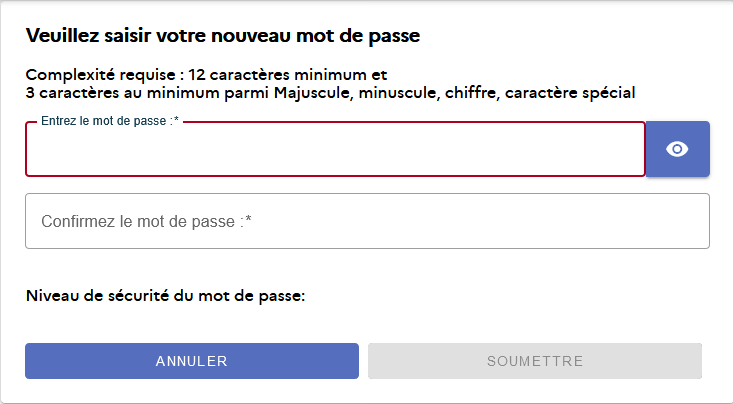
Please note : This page is only displayed in French.
Enter and confirm your password and click « SOUMETTRE ».
Once your user account is activated, you will be redirected to the logged-in home page of the qualification portal. Once you are logged into your account, you can access the "Dataset" domain.
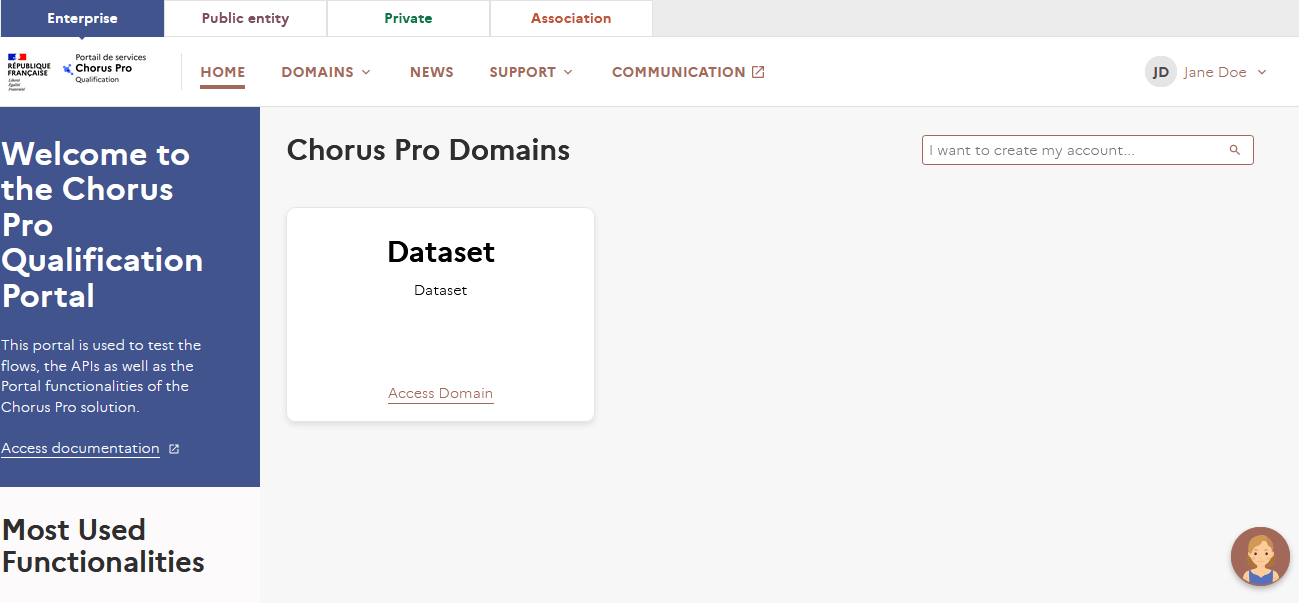
There are three different types of dataset:
- "Structures and users" dataset, containing fictitious structure and user identifiers,
- The "Payment Requests" dataset, which contains data on invoices that already exist in the qualification portal, with all types of status and different billing frameworks,
- « Commitments" dataset, containing commitment numbers that can be used for tests.
The first mattress to be created is the "Structures and users" dataset. It is then possible (but not mandatory) to create the "Payment Requests" and " Commitments" dataset, in that order. In fact, it is not possible to create the "Commitments" dataset if the "Payment requests" dataset has not been created first.
1.4 Generation of a dataset
The first generation of a data mattress is the "Structures and users" mattress.
To begin, access the "Dataset " domain.
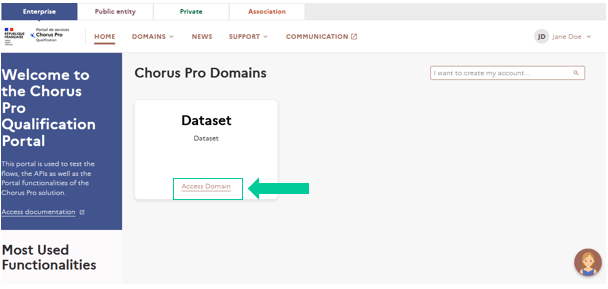
Then click on "Access Service" in the "Generate a dataset" application.
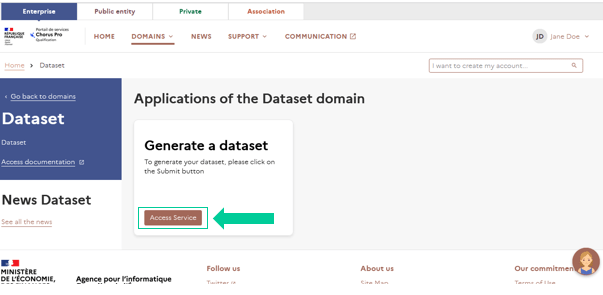
In the "Generate a dataset" application, click on "Submit".

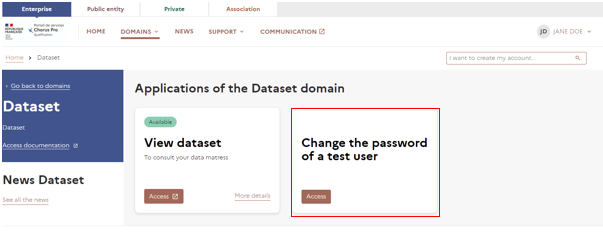
Once the dataset is generated, you will be redirected to the "Dataset" domain. Two new applications are available: "View dataset" and "Change the password of a test user".
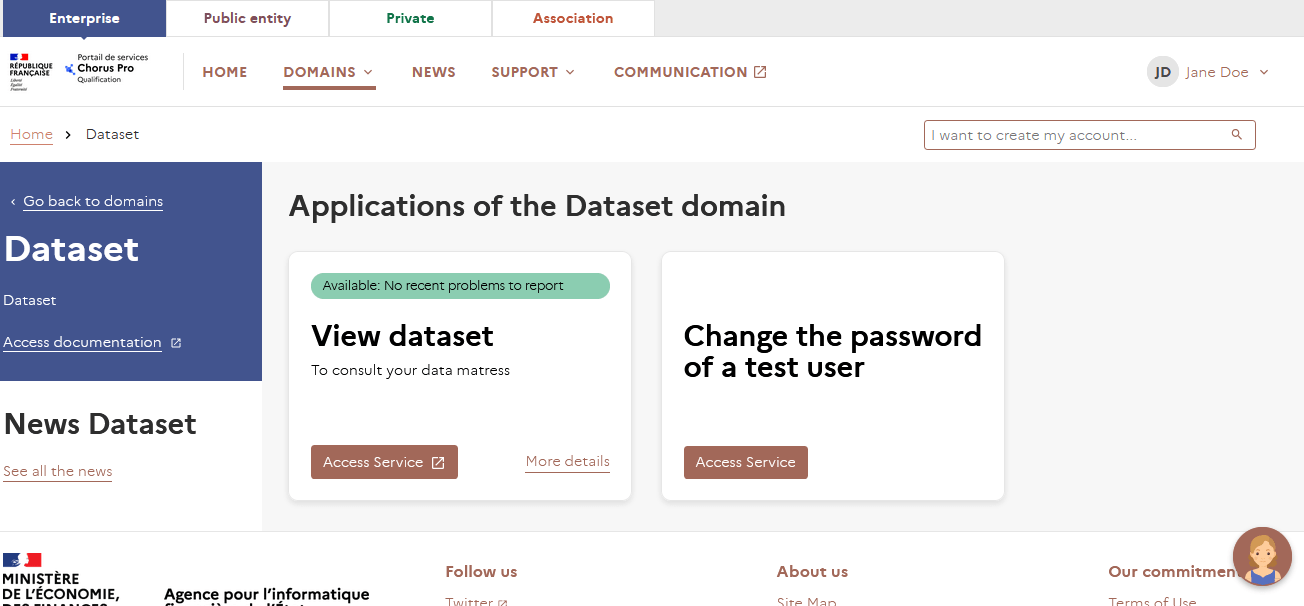
To consult the generated dataset, simply click on "Access Service" in the " View dataset " application.
You are redirected to the dataset consultation page.
This application allows you to consult the generated mattresses, to download them (1), to extend them, or to create new ones (2).

To obtain the file corresponding to the generated dataset, click on the download icon in the "Actions" column.
A window will open to allow you to download the file.
The provision of the dataset is not instantaneous, it requires the execution of a scheduled processing every 15 minutes.
The user receives a notification on his contact email address as soon as the generation of the dataset is completed.
After generating the first "Structures and users" data set, you can generate the "Payment requests" and "Commitments" data sets if you wish.
To do this, you need to use the "View Dataset" application in the "Dataset" domain.
In the application, simply click on the "Create" button in the block corresponding to the set of your choice.
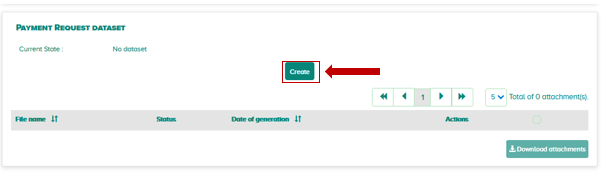
As a reminder, the sets must be created in the following order: "Structures and users", "Payment requests", "Commitments".
To format the data set in a readable way, we suggest that you save it on your computer in CSV format.
Open a spreadsheet program and import the CSV file corresponding to your data set. In Excel, for example, opening a CSV file will bring up the text import wizard.
Step 1: Click on "Next
Step 2 : Check the semicolon separator option and click on "Next".
Step 3 : Select all columns in the data preview and check the "Text" data format. This will avoid the transformation of long numerical sequences into unreadable notations in Excel.
Step 4 : Click "Finish" to open the file in spreadsheet format, with a clear distinction of the different columns.
For ease of use, it is useful to set up a filter on the first row of the table. This will allow you to find the data you need more quickly among the rows of the file.
The data mattresses allow each entity to have all the data necessary to carry out various test cases in the qualification space.
- Content of the "Structures and users" dataset.
| Object of the set ("Entity" column) | Corresponding use case |
| Supplier | Structure to be used to issue invoices |
| Validator | Structure used to simulate validation of co-contracting or subcontracting |
| Recipient | Structure to be used as invoice recipient |
| MOE | MOE to be used for tests on work invoices |
| MOA | MOA to be used for tests on work invoices |
| Recipient 2 | Structure to be used as invoice recipient |
| Recipient | State Recipient structure of type State |
| Recipient with mandatory service | Invoice recipient structure imposing a service code |
| Recipient with mandatory EJ | Invoice recipient structure imposing a commitment number |
| Recipient with mandatory EJ or service | Invoice recipient structure imposing commitment number OR service code |
| Recipient without parameter | Invoice recipient structure without mandatory parameter |
- Contents of the "Payment Requests" dataset
| Object of the set ("Entity" column) | Corresponding use case |
| Invoice | Invoices already existing on the qualification portal, with all types of statuses and different invoicing frames |
- Contenu of « Commitments» dataset
| Object of the set ("Entity" column) | Corresponding use case |
| Commitment | Commitment numbers that can be used in test |
Once the data set has been downloaded to your workstation, disconnect by clicking on the arrow next to your name in the top right-hand corner of the screen, then on "Disconnect".
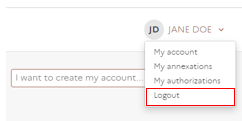
You will then be redirected to the home page of the qualification environment of the Chorus Pro service portal.
To perform your tests, you must use the data from your different sets.
To connect with a fictitious user, you must first identify the data of the "Structures and users" set that meets your needs for the test you want to perform. In the example below, the selected user is a provider with the rights of the main manager on his structure.
Then you can enter the login address (referred to as login in the data set) and password on the login page of the qualification portal and log in.
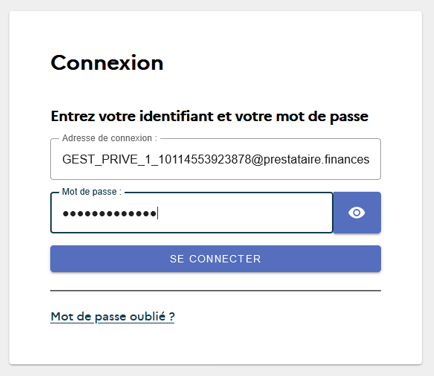
Please note : This page is only displayed in French.
Thus, in the example, the user will be connected as the main manager of structure 10114553923878 of the "Structures and users" data set.
Once authenticated, all the functionalities of the Chorus Pro services portal can be used: structure management, user management, invoice submission, invoice processing, flow monitoring, etc.
The qualification portal is a simulation platform: you can therefore carry out your tests with complete peace of mind, as none of the invoices you submit in this environment will be sent to a real public entity.
The qualification portal allows you to manage the passwords of the dummy accounts in the "Structures and users" data set. To do so, log in with your personal login and access the "Change the password of a test user " application.
In the application, you can select the user of your choice and change his or her password by entering it in the dedicated field. To validate, click on "Submit".
2. Main fonctionnalities
The functionalities of the qualification portal are identical to the functionalities of the production portal. In the same way, the rights specific to each profile are identical to the rights of the production portal.
All the documentation proposed for the production portal is applicable to the qualification portal.
The documentation is available on the Chorus Pro Community.
The qualification space is a test environment. It is strictly separated from the Chorus Pro portal used for sending invoices to the public sector. Therefore, as mentioned above, none of the actions taken on the qualification portal have any consequence on the sending or receiving of invoices on the Chorus Pro service portal. For this reason :
- An invoice sent from the qualification portal will arrive on a fictitious public structure.
- A connection request made on the qualification portal is specific to this environment.
The qualification space is used with the user profiles provided in the data mattress. Therefore, the response to a request issued from the qualification portal will be sent to the user profile used to issue this request (and not to your "real" personal profile). You will therefore have to log in under this profile to consult the response in its "Solicitations Issued " application. To facilitate the work of Support, we strongly recommend that you replace the generic contact address associated with this test user with your own, in the "My Account" section.
3. Functionalities related to the connection
The qualification portal can be connected to a partner's external system. For these cases, the functionalities of the qualification portal are:
- Make an EDI or API technical connection request,
- Send flows to the qualification environment,
- Receive flows from the qualification environment,
- Send API calls,
- Follow up on flows sent by EDI or API.
All the documentation proposed for the production portal is applicable to the qualification portal. The documentation is available on the Chorus Pro Community.
In addition to these functions, the qualification portal has a function for testing incoming and outgoing formats.
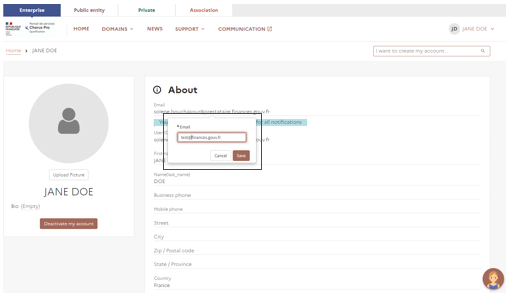
Before going to make your connection request with your test user, it is recommended that you indicate your real contact address in your user file, instead of the generic address proposed by default. This will make it easier for Chorus Pro Support to contact you in case of a problem.
To access your user file, you must click on the arrow next to your name and click on "My account". You will then be able to change your contact email address.
Once this step is completed, you can make your connection request to the qualification space.
To do this, log in to the account of a data mat user, go to the "Connection" domain and access the "EDI" or "API" application, depending on your connection method. Une fois cette étape réalisée, vous pouvez effectuer votre demande de raccordement à l’espace de qualification.
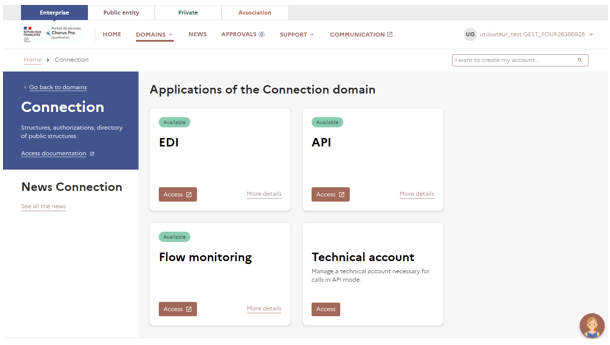
You can then make your connection request by clicking on the dedicated tabs.
This procedure is described in detail in the Chorus Pro Connection user guide.
When you make your connection request on the qualification space, remember to fill in your real contact details in the request form, otherwise Chorus Support will never be able to reply. Indicate the name of your company in the comment field.
4. Functionalities related to the monitoring of flows
There are two solutions for sending flows to the qualification portal:
- Technical connection
This solution consists of connecting the qualification portal to an information system in API or EDI mode as part of a qualification phase. This solution requires meeting all the technical requirements of a connection.
- Manual submission from the portal
This functionality offers the possibility of submitting a flow directly from the Chorus Pro qualification portal without making a technical connection (and therefore without meeting the technical requirements of a connection). In particular, this allows you to test the flow formats transmitted to Chorus Pro.
To submit a flow, access the "Connection" domain and then the "Flow monitoring" application according to your connection.
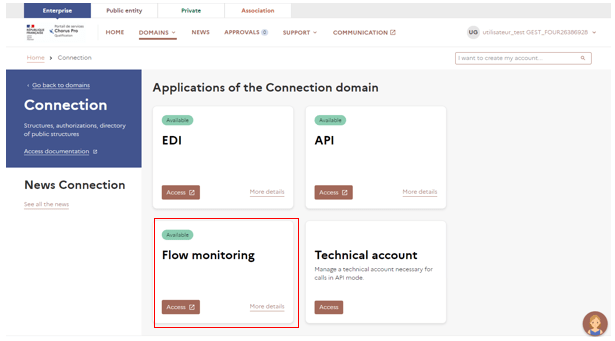
In the application, select the "Data flow submission" tab to access the fonctionality :

Prior to the data flow submission, a test file must be available locally on the workstation used.
Select the data flow issuer (necessarily from the dataset) :

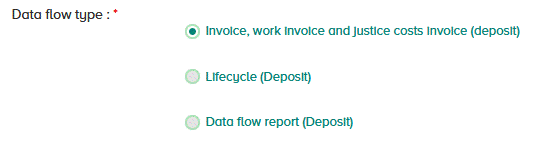
Precise the type of data flow submitted :
Select the interface code of the data flow submitted (the drop-down list proposed varies according to the type of flow selected beforehand) :

Precise whether the flow is electronically signed or not :

Finally, confirm the expected data flow syntax :

- If « CPPStatut » is ticked, the return flow format will be a FEN1200 ;
- if « AIFEStatut » is checked, the return flow format will be a FEN1201.
Select Browse to download the test file from your workstation :

Once the file is downloaded, two functionalities are proposed :
- Analyze allows an analysis of the downloaded file, without submitting it in the exchange system.
- Submit allows to submit a file in the exchange system, the file will then be processed according to the same principles as a file sent via interface.

Last Update: March 18, 2022