
The Chorus Pro services portal offers features that allow you to manage the information related to your user account. To access it, log in and click on your name at the top right of the screen. Then, click on the item of your choice in the drop-down list: "My account", "My annexations", "My authorizations", « History of my requests ».

To access your user account, once you have logged into the Service Portal, click on your name at the top right of the screen and click on "My Account" in the drop-down list.
This will take you to the form containing your personal information: last name, first name, phone number, work address, etc.
On the left, you can also consult your profile photo and your biography.
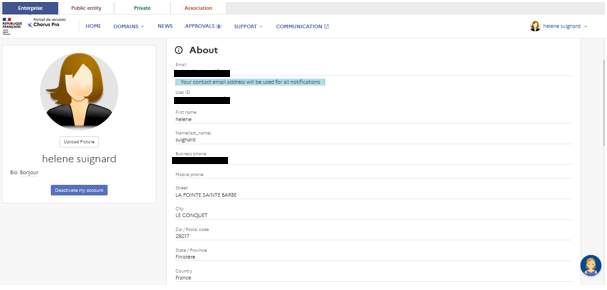
To modify a piece of information, simply click on the desired field. A small window containing an input field will appear to allow you to modify the desired data. To validate your entry, click on "Save".
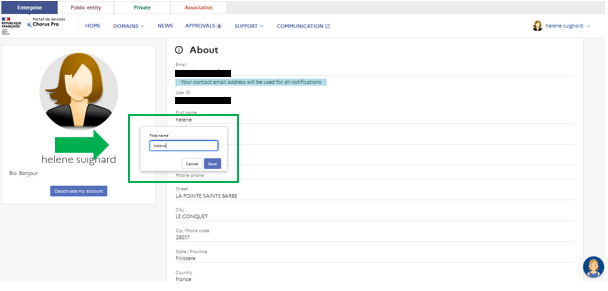
You have the ability to set up notifications to keep you informed of activity on your account.
To set up notifications about your invoices and the progress of their processing, click on "false" in the "Notification Invoicing" field. A small window will appear: check the "Notification Invoicing" box and click "Save".

The value indicated will then change to "TRUE".
You can set up the notifications concerning the information emails sent by the AIFE support, this time in the "News Notification" field.
To deactivate your user account, simply click on the "Deactivate my account" button under your biography on the left side of the screen.
You will then be redirected to the "Deactivate/Reactivate a user account" page. You will then need to check the "Disable my access" box and click "Submit".
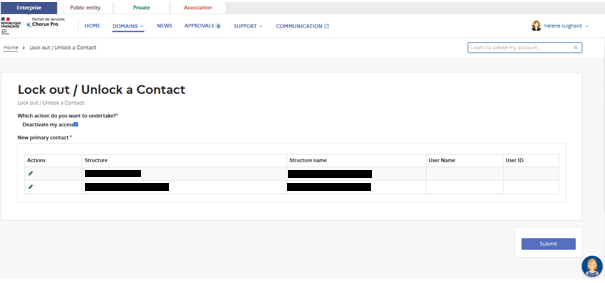
Attention: If you are the main manager of the structure, you will be asked to designate a new manager before deactivating your account : https://communaute.chorus-pro.gouv.fr/documentation/manage-users/?lang=en
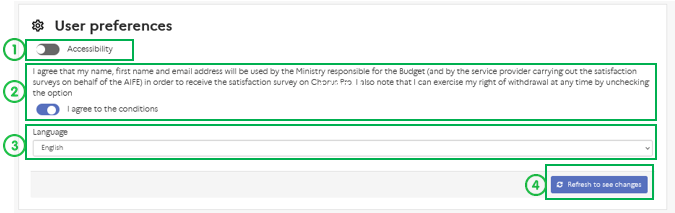
The "User Preferences" block allows you to manage your accessibility preferences and choose the language of the tool.
To enable accessibility, click on the button below the "Accessibility Enabled" field (1). This will change color when the option is enabled.
To accept the conditions allowing the AIFE to use the account to send satisfaction surveys, click on the button. The button will change to green when the option is enabled (2).
To change the language, click on the small arrow to the right in the "Language" field and select the language of your choice from the drop-down list (3).
To apply your new preferences, click on the "Refresh to view changes" button (4) that appears when changes are made.
To be able to access the various Chorus Pro features, all users must be attached to their structure (to a public or private entity).
To consult your attachments, click on your name at the top right of the screen and click on "My annexations" in the drop-down list.
This will take you to the "My attachments" block, which lists all the structures to which you have access.
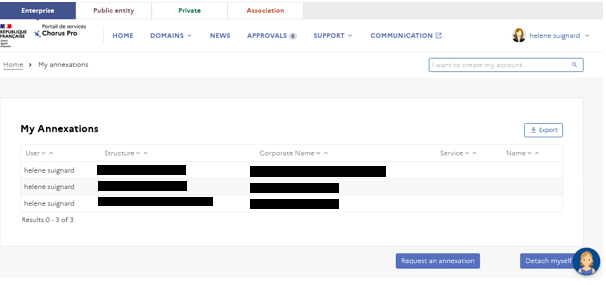
To request an attachment, click on the "Request an annexation" button.
You will be redirected to the "Request to be connected to a structure" form.
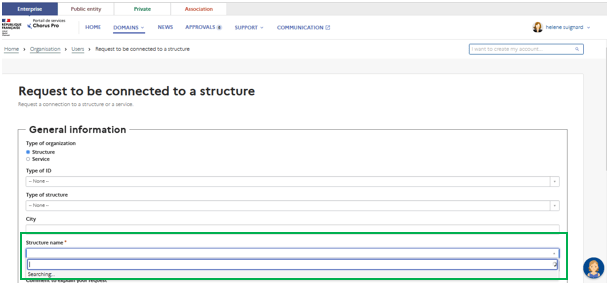
You will then have to fill in the information of the structure to which you wish to be attached. Required fields are marked with a red asterisk.
In the Company Name field, you can search for a structure by its identifier, company name or type.
It is mandatory to enter a comment to explain your request.
To validate your request, click on "Submit" at the bottom right of the form.
It is possible to make a connection request to the service mesh

When the structure is selected, the services are displayed. You can have access to all the departments or just a few. If you want to be attached to a particular service, check the service(s) you want to be attached to on the right.
In case the selected structure has many services, in the search bar you can enter the code or the name of the service you want to be attached to, and it will be displayed.
Then click Submit. A green message will indicate confirmation of the annexation request. You are then automatically redirected to the Users area page.
Please note that, in order to be validated, your annexation request must be validated by the main manager or a user with this right on the requested structure.
It is also possible to remove your attachment to a structure by clicking on the "Detach myself" button. You will be redirected to the dedicated form.
You will then be able to choose the structure from which you want to detach yourself, and at which level: structure or service level.
To validate the operation, click on "Submit" at the bottom right of the form.
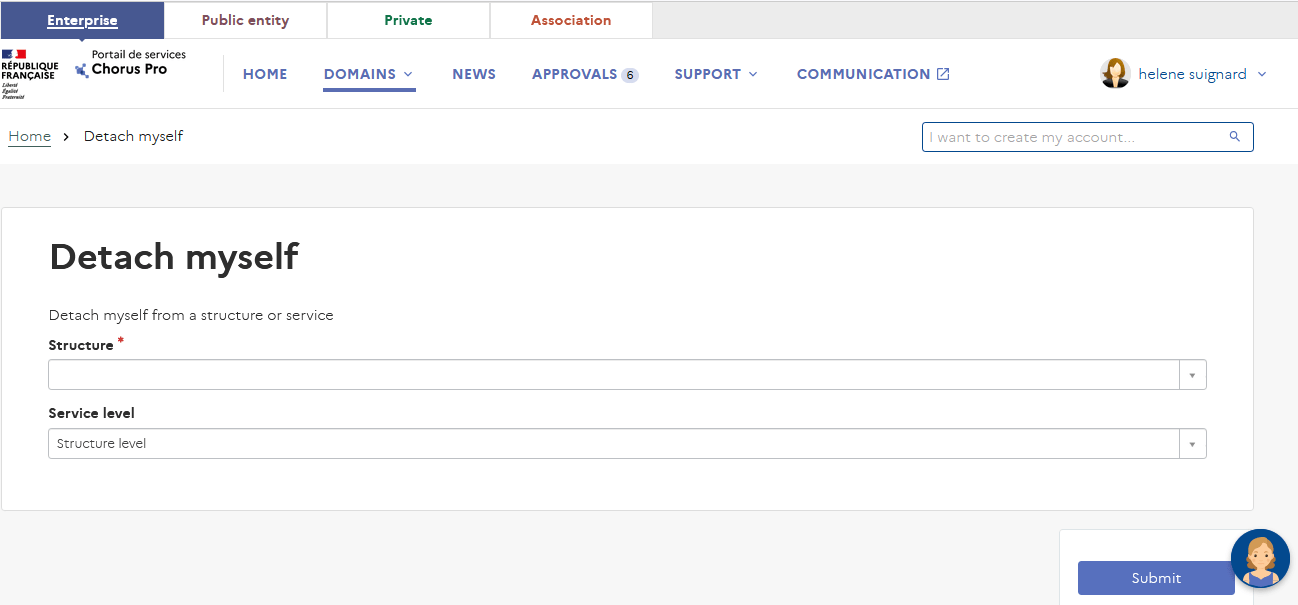
It is possible to be detached on several services on which you are authorized. To do so, check the services level to which you wish to be attached.
To validate the operation, click on "Submit" at the bottom right of the form.
To view the permissions you have for the facilities to which you are attached, click on your name at the top right of the screen and click on "My authorizations" in the drop-down list.
The "My authorizations" table lists all the profiles that are assigned to you for each structure.
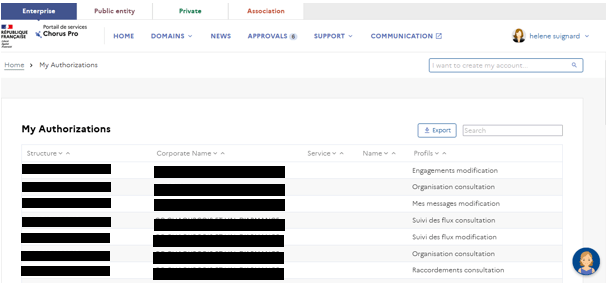
Each profile is composed of the name of a domain or application and the level of access you have. For example, the "Issued Invoices - Modification" profile gives you modification rights in the "Issued Invoices" application.
To manage your authorizations, click on the "Manage my authorizations" button at the bottom of the "My authorizations" list.
In the form that appears, select the structure and the department for which you wish to manage your authorizations.
A table detailing the profiles you have is displayed.

You can then :
- Add a new clearance by clicking on the « Add » button (1),
- Delete all the authorizations you have by clicking on the "Remove all" button (2),
- Modify an authorization by clicking on the pencil icon (3) in the "Actions" column on the line of the authorization concerned,
- Delete an entitlement by clicking on the cross icon (3) in the "Actions" column on the line of the entitlement concerned.
To validate the operation, click on "Submit" at the bottom right of the form.
A green message will indicate confirmation of the clearance changes. You are then automatically redirected to the Users area page.
You can modify the email address representing your login ID.
Your connection address is used in particular to receive emails allowing you to reset your password. Also it is necessary that your connection identifier represents an existing address on which you can receive emails. If you need to change your login, click on “Change my connection address”.
You can then indicate your new address in the form shown below:
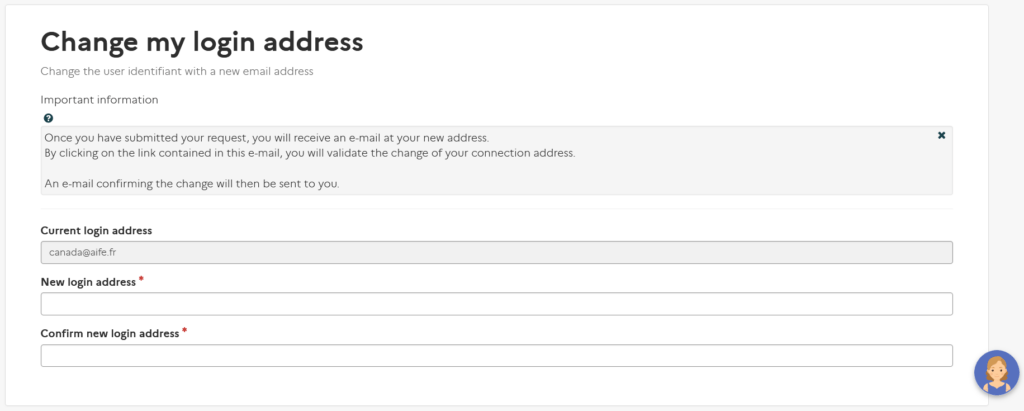
Once your request has been submitted, you will receive an email on your new connection address. Click on the link contained in this email to validate and finalize the change of connection address.
Please note that it is not possible to make several requests for a change of connection address simultaneously: if a change request has been submitted, it will be necessary to complete it to make a new request. Without action on the part of the user on the link confirming the change of address within 24 hours, the request will be canceled.

Last Update: April 16, 2024